Get Started with Google Maps for Jira
Welcome!
The description below will help you to learn more about all Google Maps features.
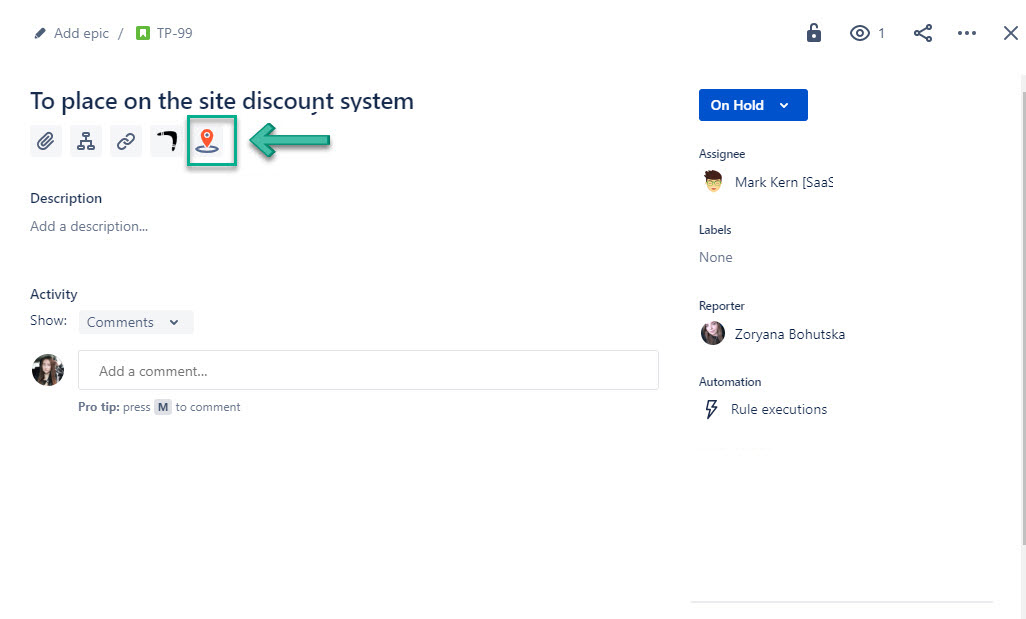
1. Select Google Maps for the Jira icon
To start working with Google Maps, tap on its icon at the Issue View Panel and the map will be loaded. All users who have access to the taskbar can add locations as an editable list. It will be displayed on the map.
2. Add Marker
There are 2 ways to add a marker:
2.1. Click the map by the left button of a mouse;
2.1.1. Add the marker's name and address.
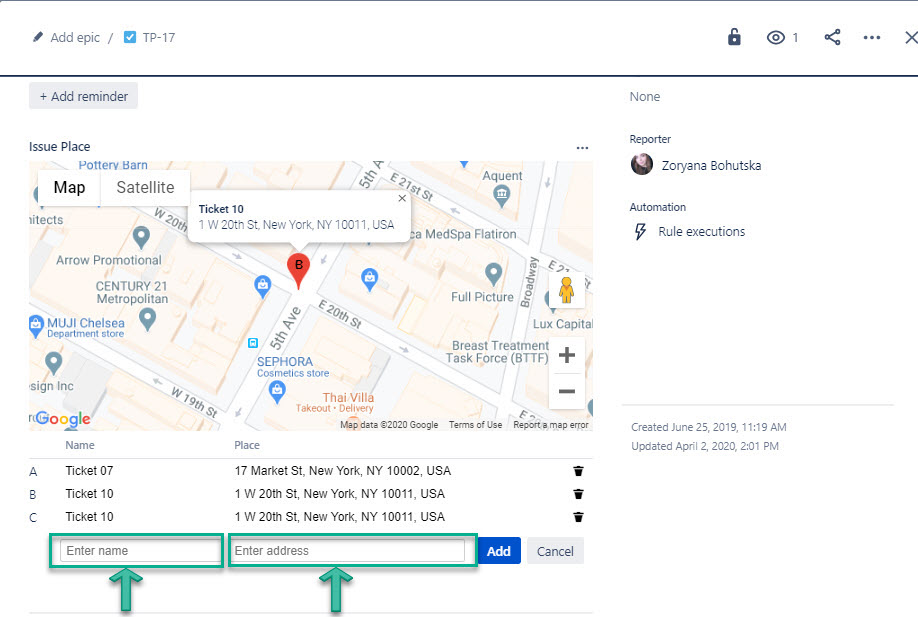
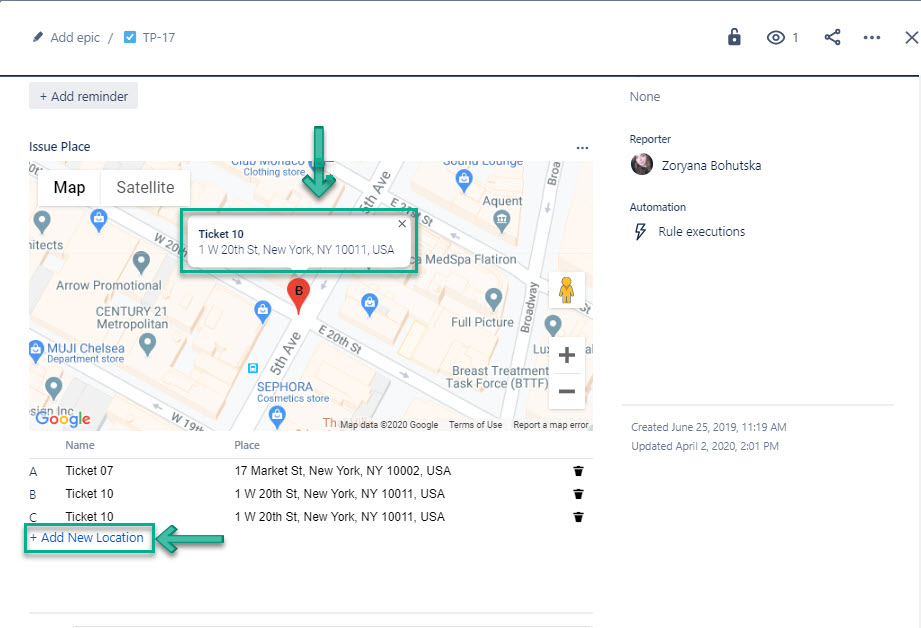
2.2. Click the "Add New Location" button;
2.2.1. Enter the marker’s name and address;
2.2.2. Press the "Add" button and save a new location.
You can add as many markers as you need for each issue.
3. Add more inform
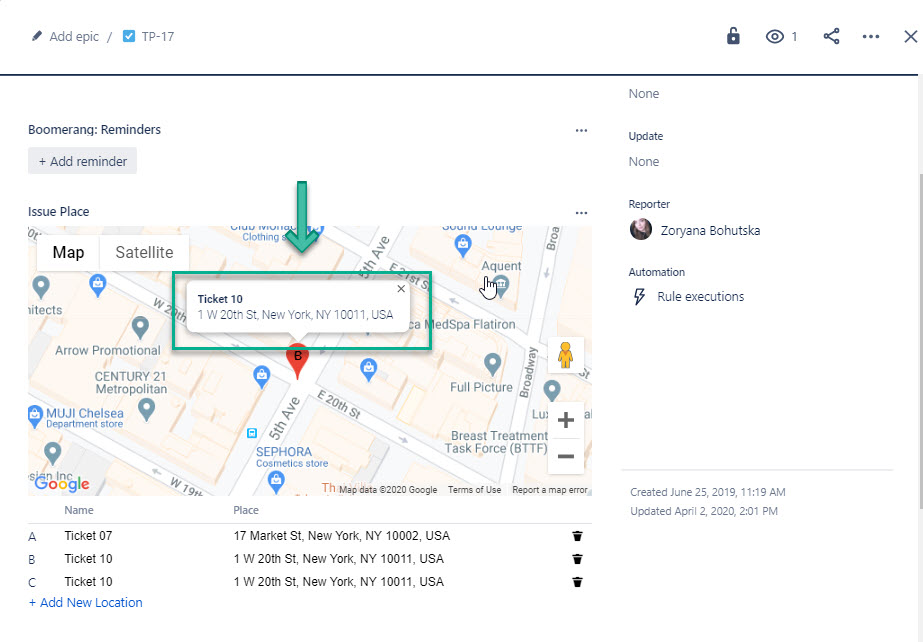
When the markers are added, click them to discover more info.
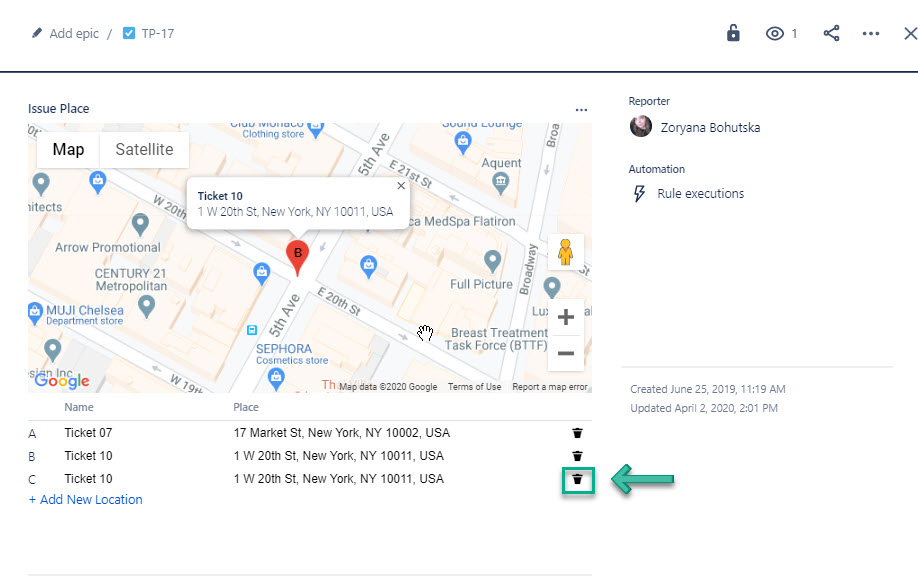
4. Edition
You will be able to Edit or Delete geolocations and its descriptions whenever you need it.
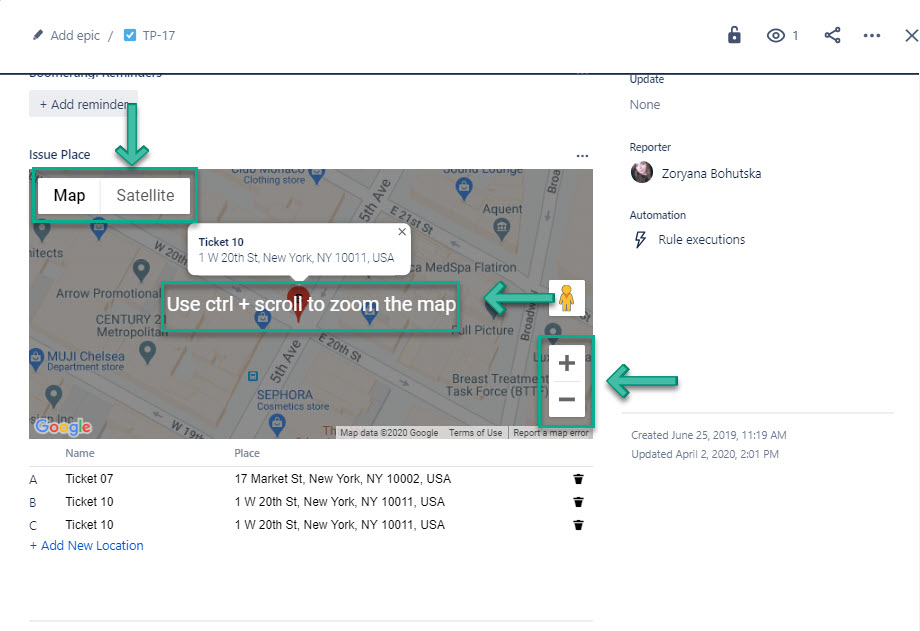
5. Customization
Add-on works with all Google maps features for interaction:
- zoom/drag,
- change map type,
- click a marker to reveal more information.
6. View markers
To view markers for each issue you need to open issue and click Google Maps for Jira icon.
7. Gadget for Jira Dashboard
You can create Gadget and monitor data on Jira Dashboard. Read more here.
8. View markers via Jira Mobile Apps.
Google Maps for Jira data is now available on mobile apps for Jira. It means that users can view geo markers that have been added before on the Google Map via mobile devices. Read more here.
If you need help or want to ask questions, please contact SaaSJet Support or email us at support@saasjet.atlassian.net |
Haven't used this add-on yet? Try it now! >>> |