...
Create New Form.
Begin your work by clicking the "+Add new" button.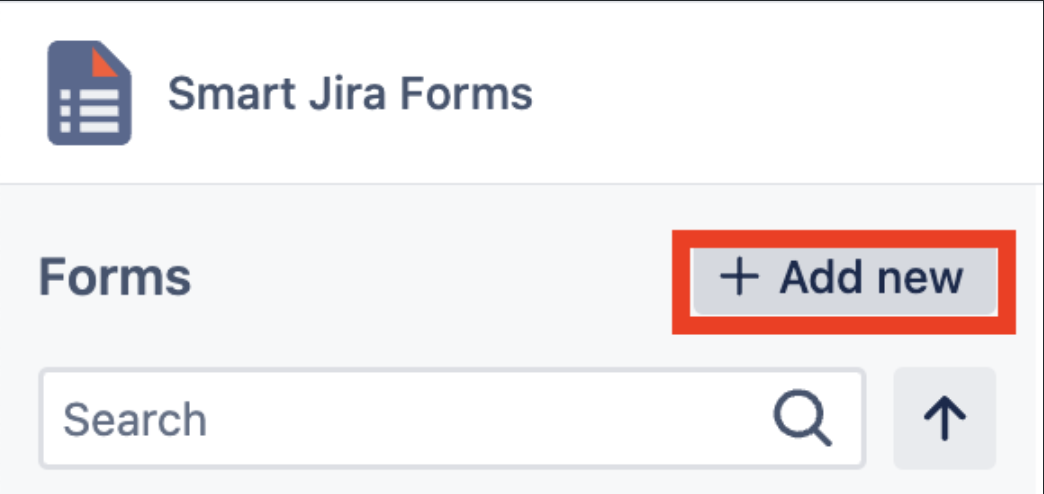
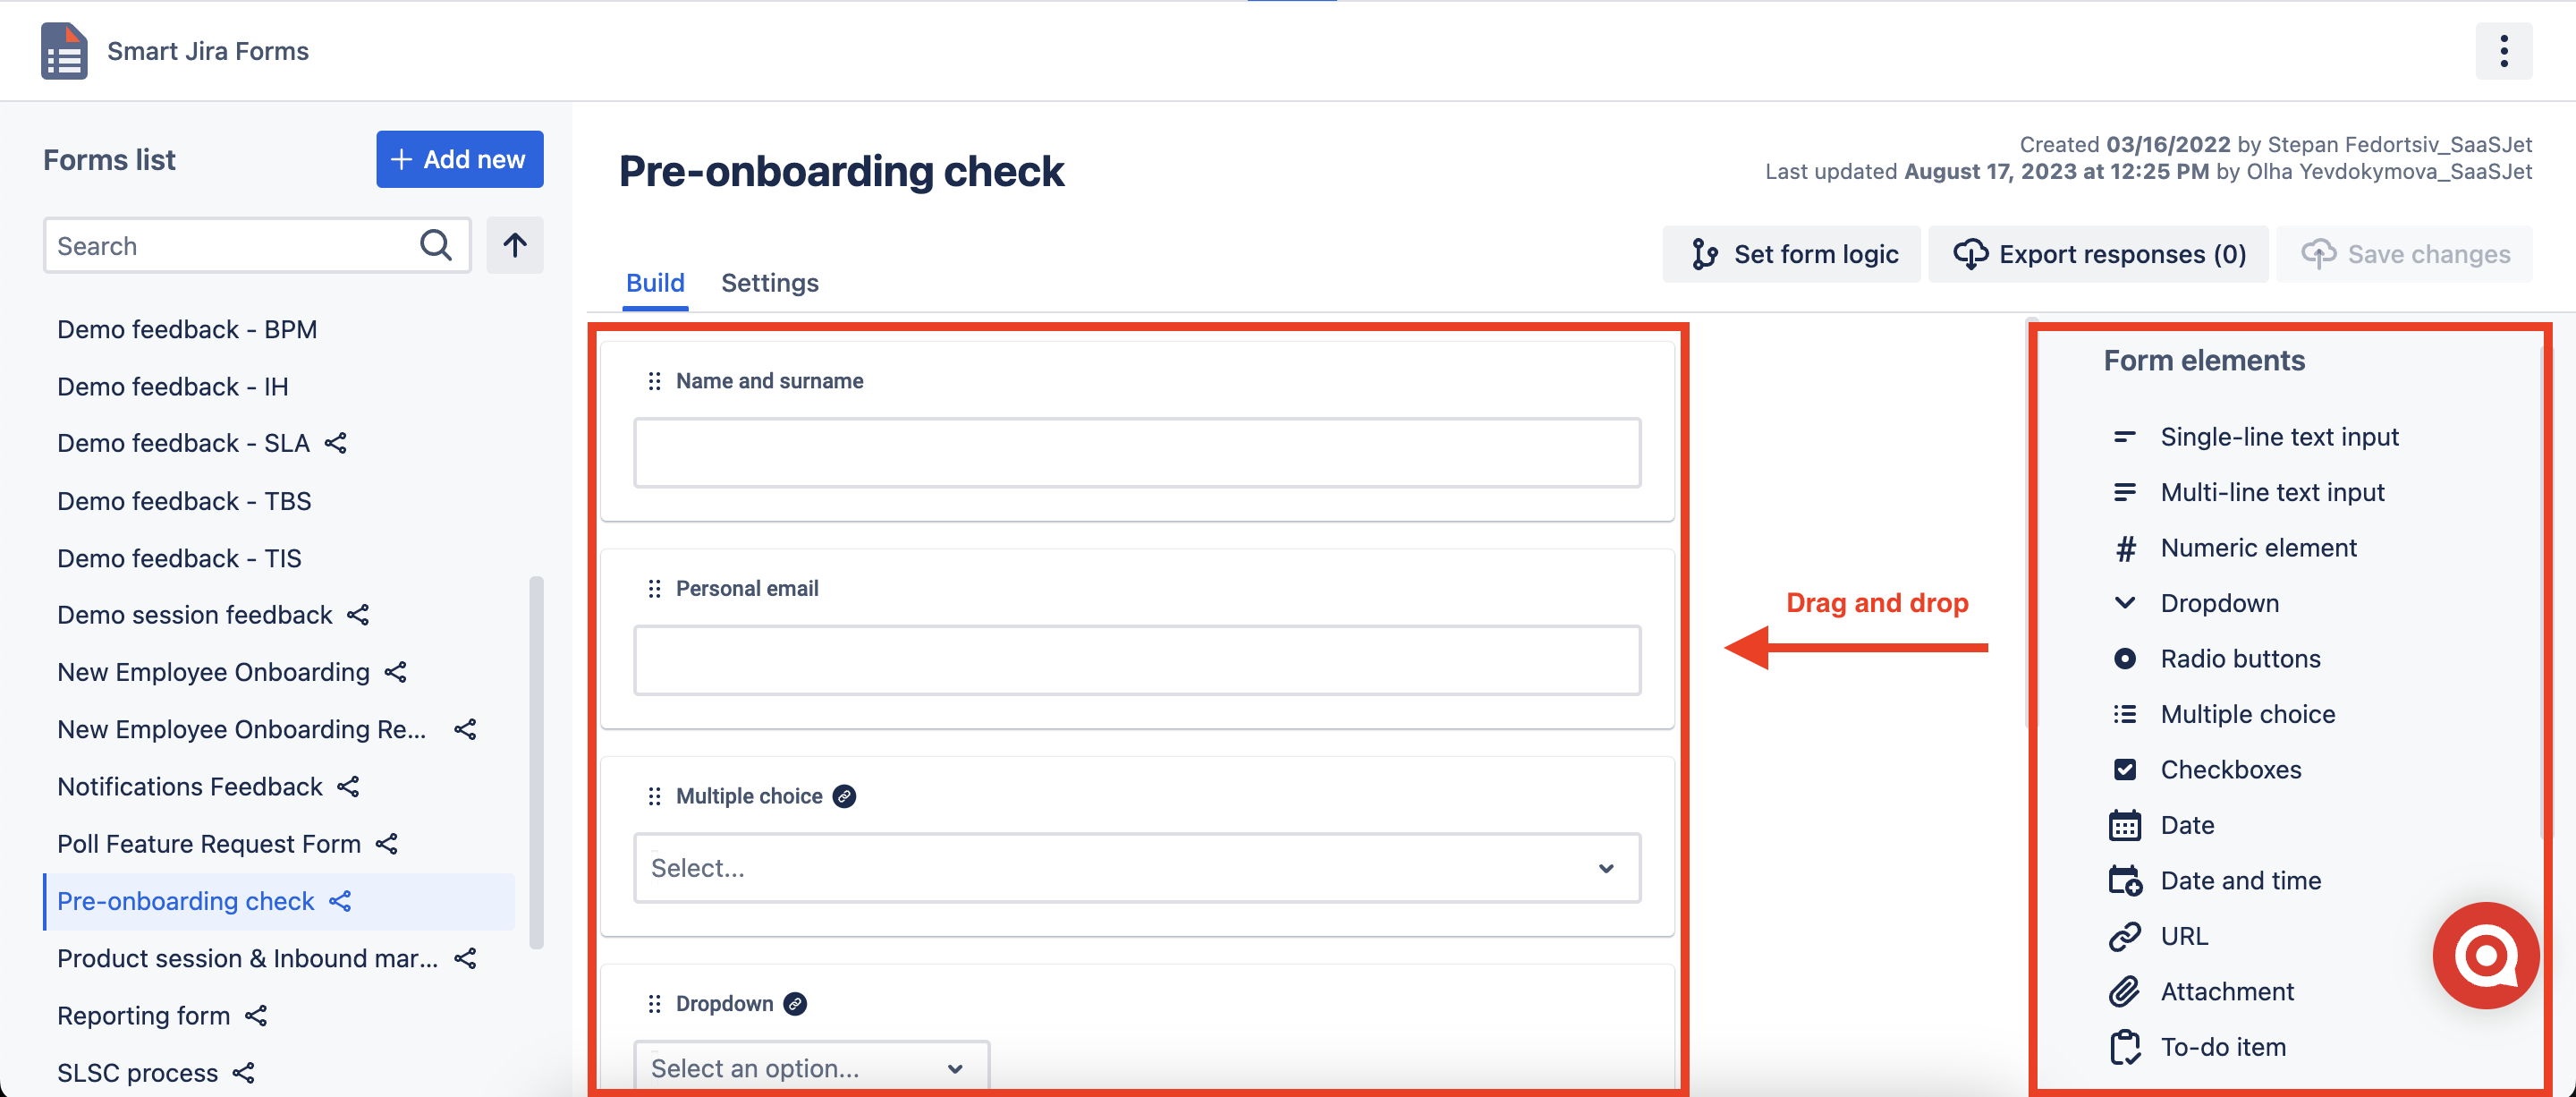
Customize your form by adding form elements or content blocks.
Effortlessly create forms in just a few minutes using the intuitive drag-and-drop form builder.
Make forms dynamic.
Harness the power of When/Then logic to create intelligent and optimized forms.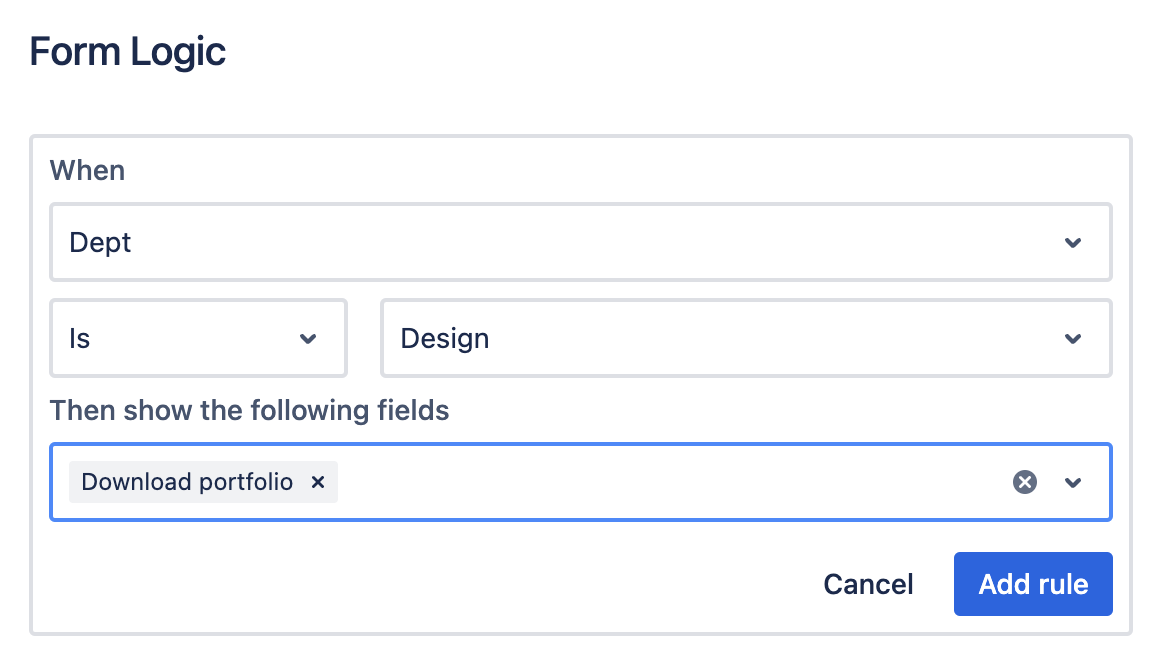
Add the form to the Customer Portal or to a Jira issue automatically / manually or even share it with external users.
Automate the form addition by configuring it to automatically attach to specific projects and issue types upon issue creation.
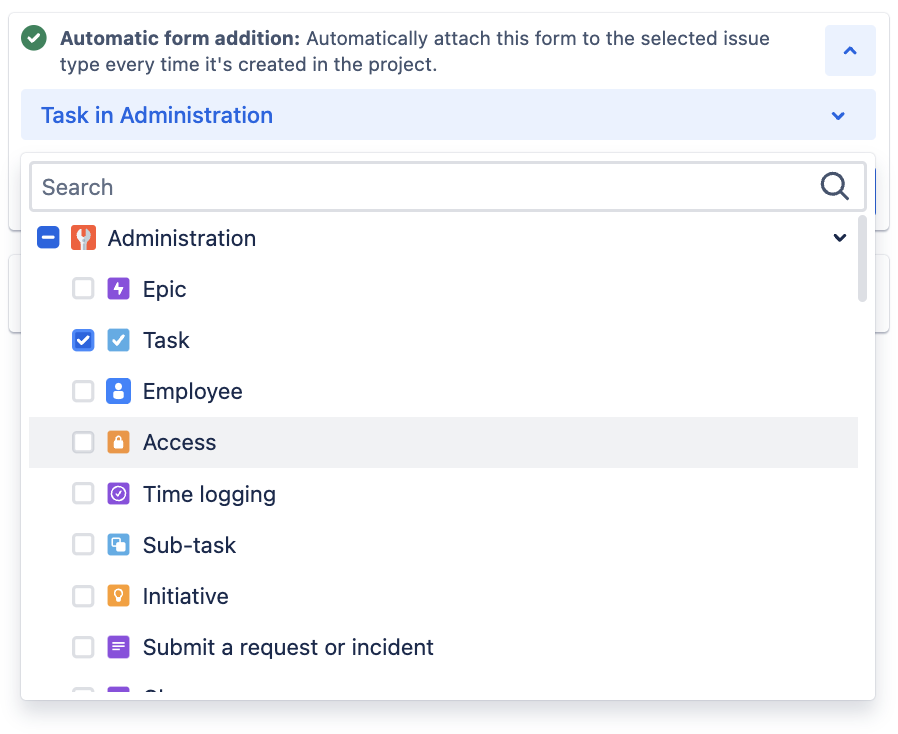
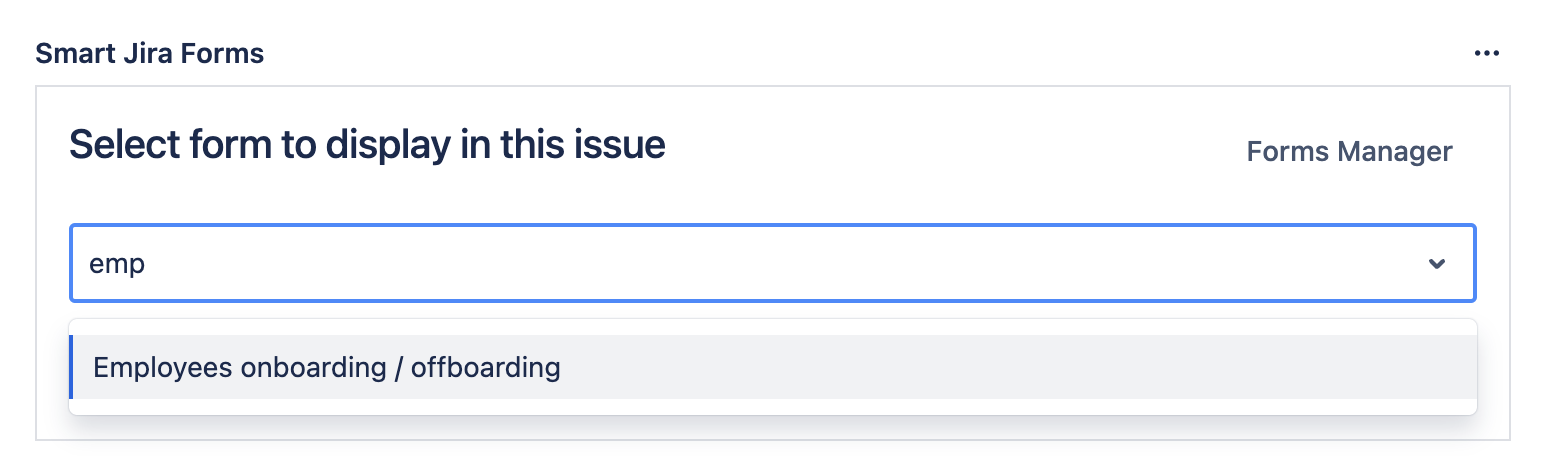
Alternatively, manually add the form by selecting it from your pre-existing form list using the add-on icon in the issue panel.
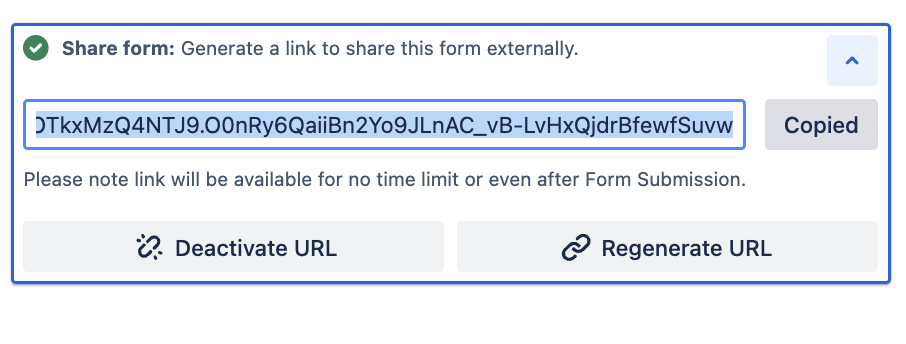
To share the form externally, access the form within the add-on, click the "Share form" icon, generate a unique URL, and share it with the intended recipient for form submission.

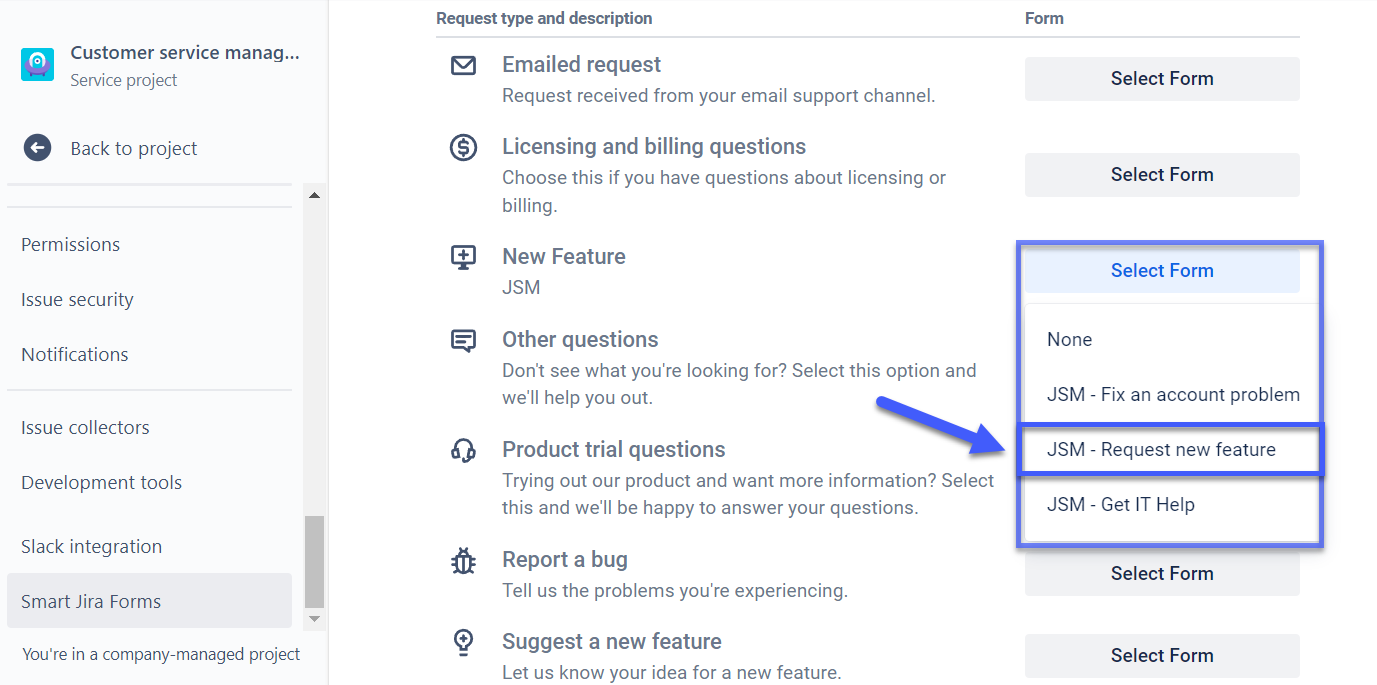
For Jira Service Management (JSM), refer to the documentation for instructions on incorporating forms into the Service Desk portal.
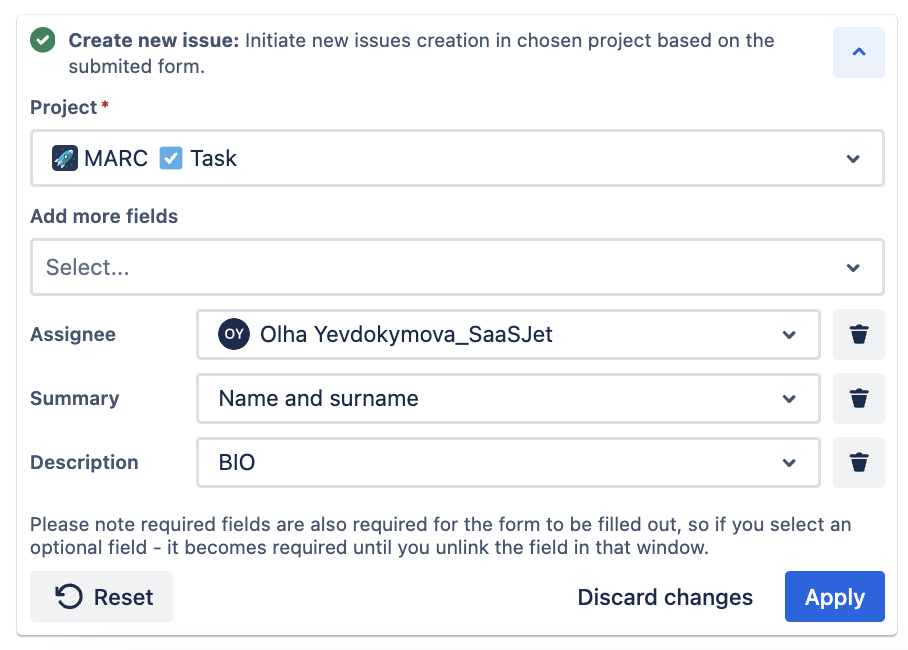
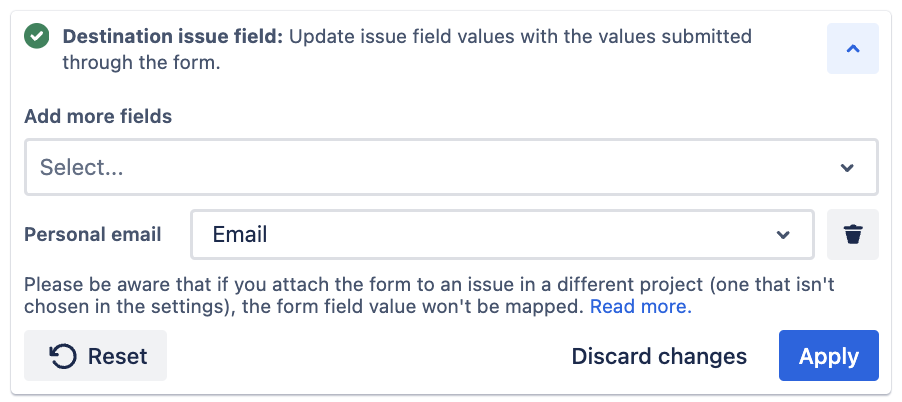
Create new Jira issues based on form responses or map issue fields based on form responses in the existing issue.


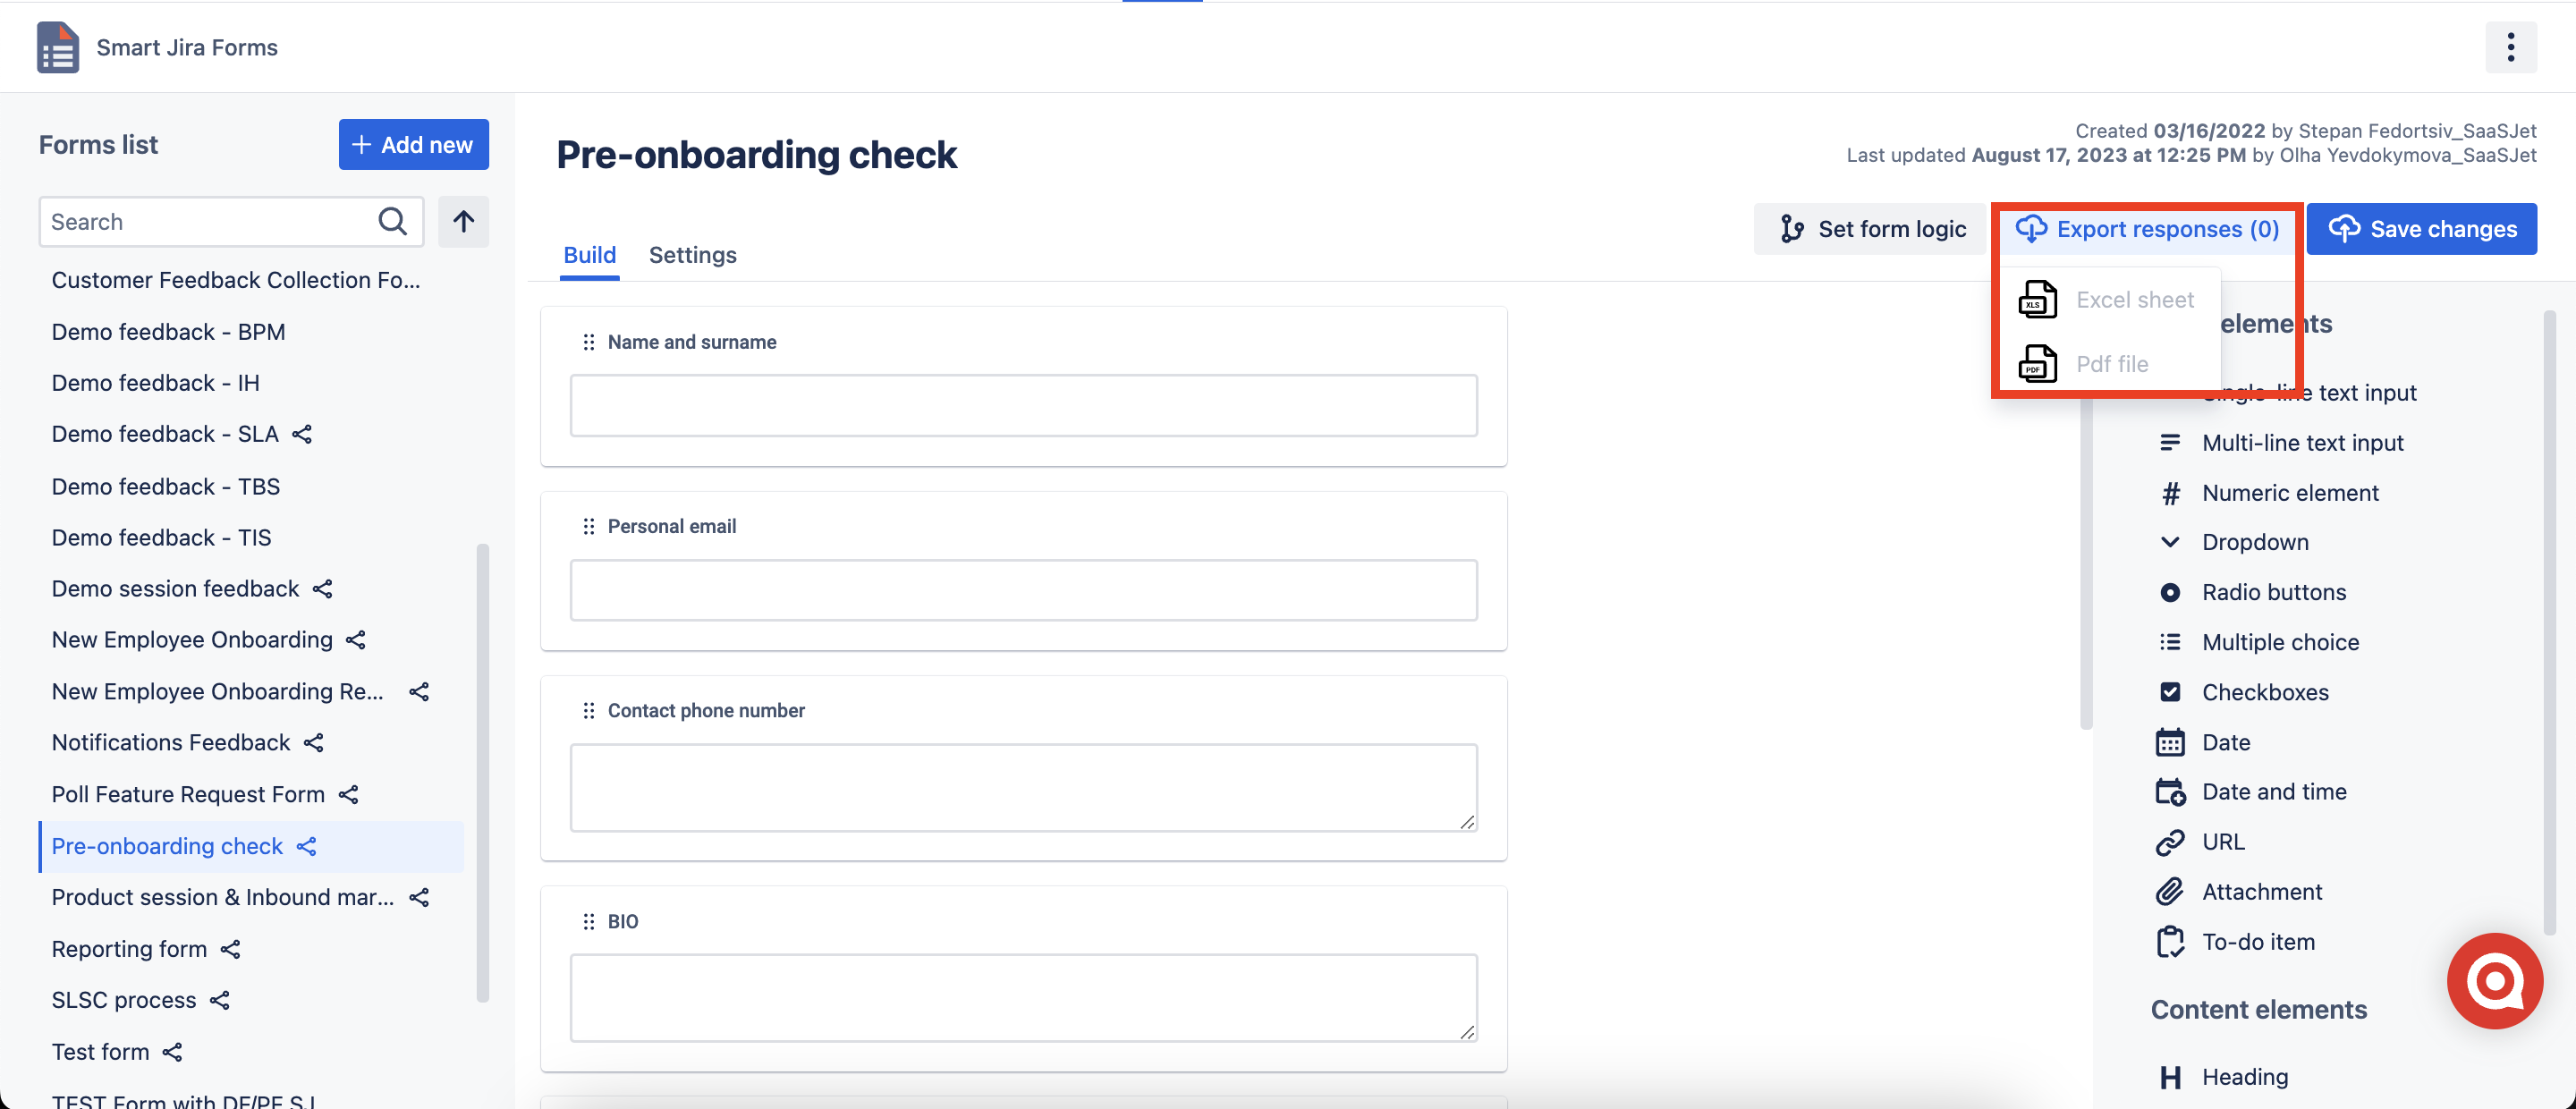
PDF or Excel Sheet Export of Form Responses.
Exporting responses in both formats provides users with the flexibility to choose the most suitable format for their specific needs, whether it's for sharing, archiving, or further data analysis.
| Info |
|---|
The date format in Audit log is set according to the date format specified in the Jira settings. |
...