There are a lot of Many recurring processes that can’t be scheduled or auto-assigned to the same people and need to start manually time by time. For these cases, you can use Manual process start and pre-assignment management. Clicking the Start button initiates the creation of Jira issues in selected Projects, enabling the quick and effortless establishment of a defined set of Jira issues without manual intervention. Also, by using Manage assignments you can assign every step to needed assigned and approvals for this one start. This feature improves workflow efficiency and ensures consistent execution, ultimately saving time and resources.
...
Automating Issues Creation: Clicking "Start" triggers the automatic creation of automatically creating a defined set of Jira issues within your chosen project. This eliminates the time-consuming task of manually creating each issue, saving you valuable time and resources.
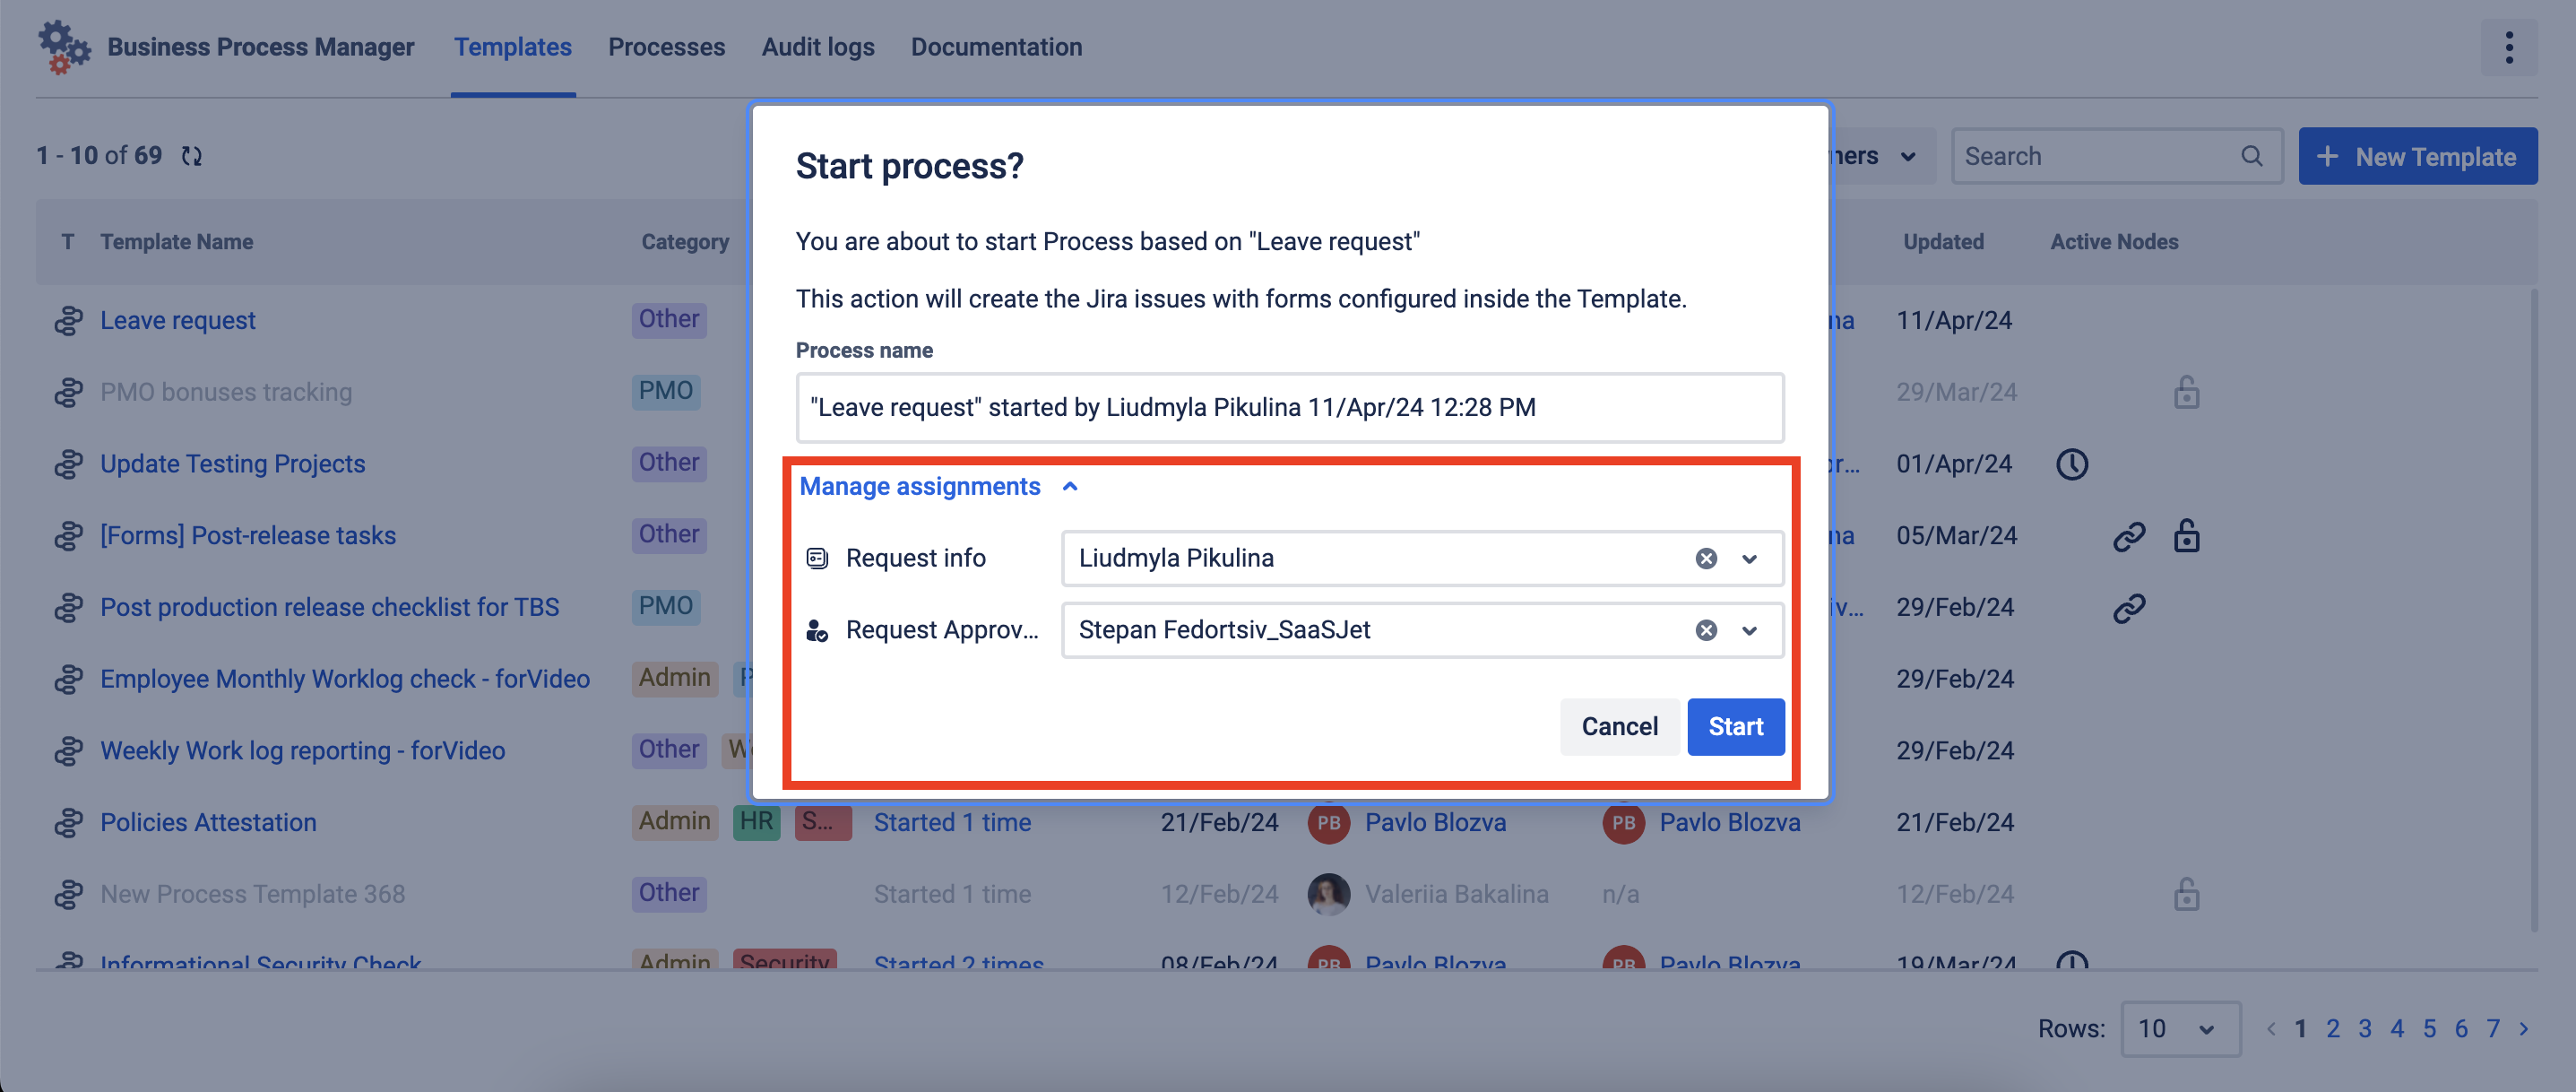
Pre-assigned Tasks and Approvals: Leveraging the "Manage assignments" feature during the process start, you can pre-assign tasks and approvals for each step within the workflow. This ensures the right people are notified and involved at the right time, keeping the process moving smoothly. This flexibility in assigning tasks empowers you to adapt the workflow to specific scenarios.
...
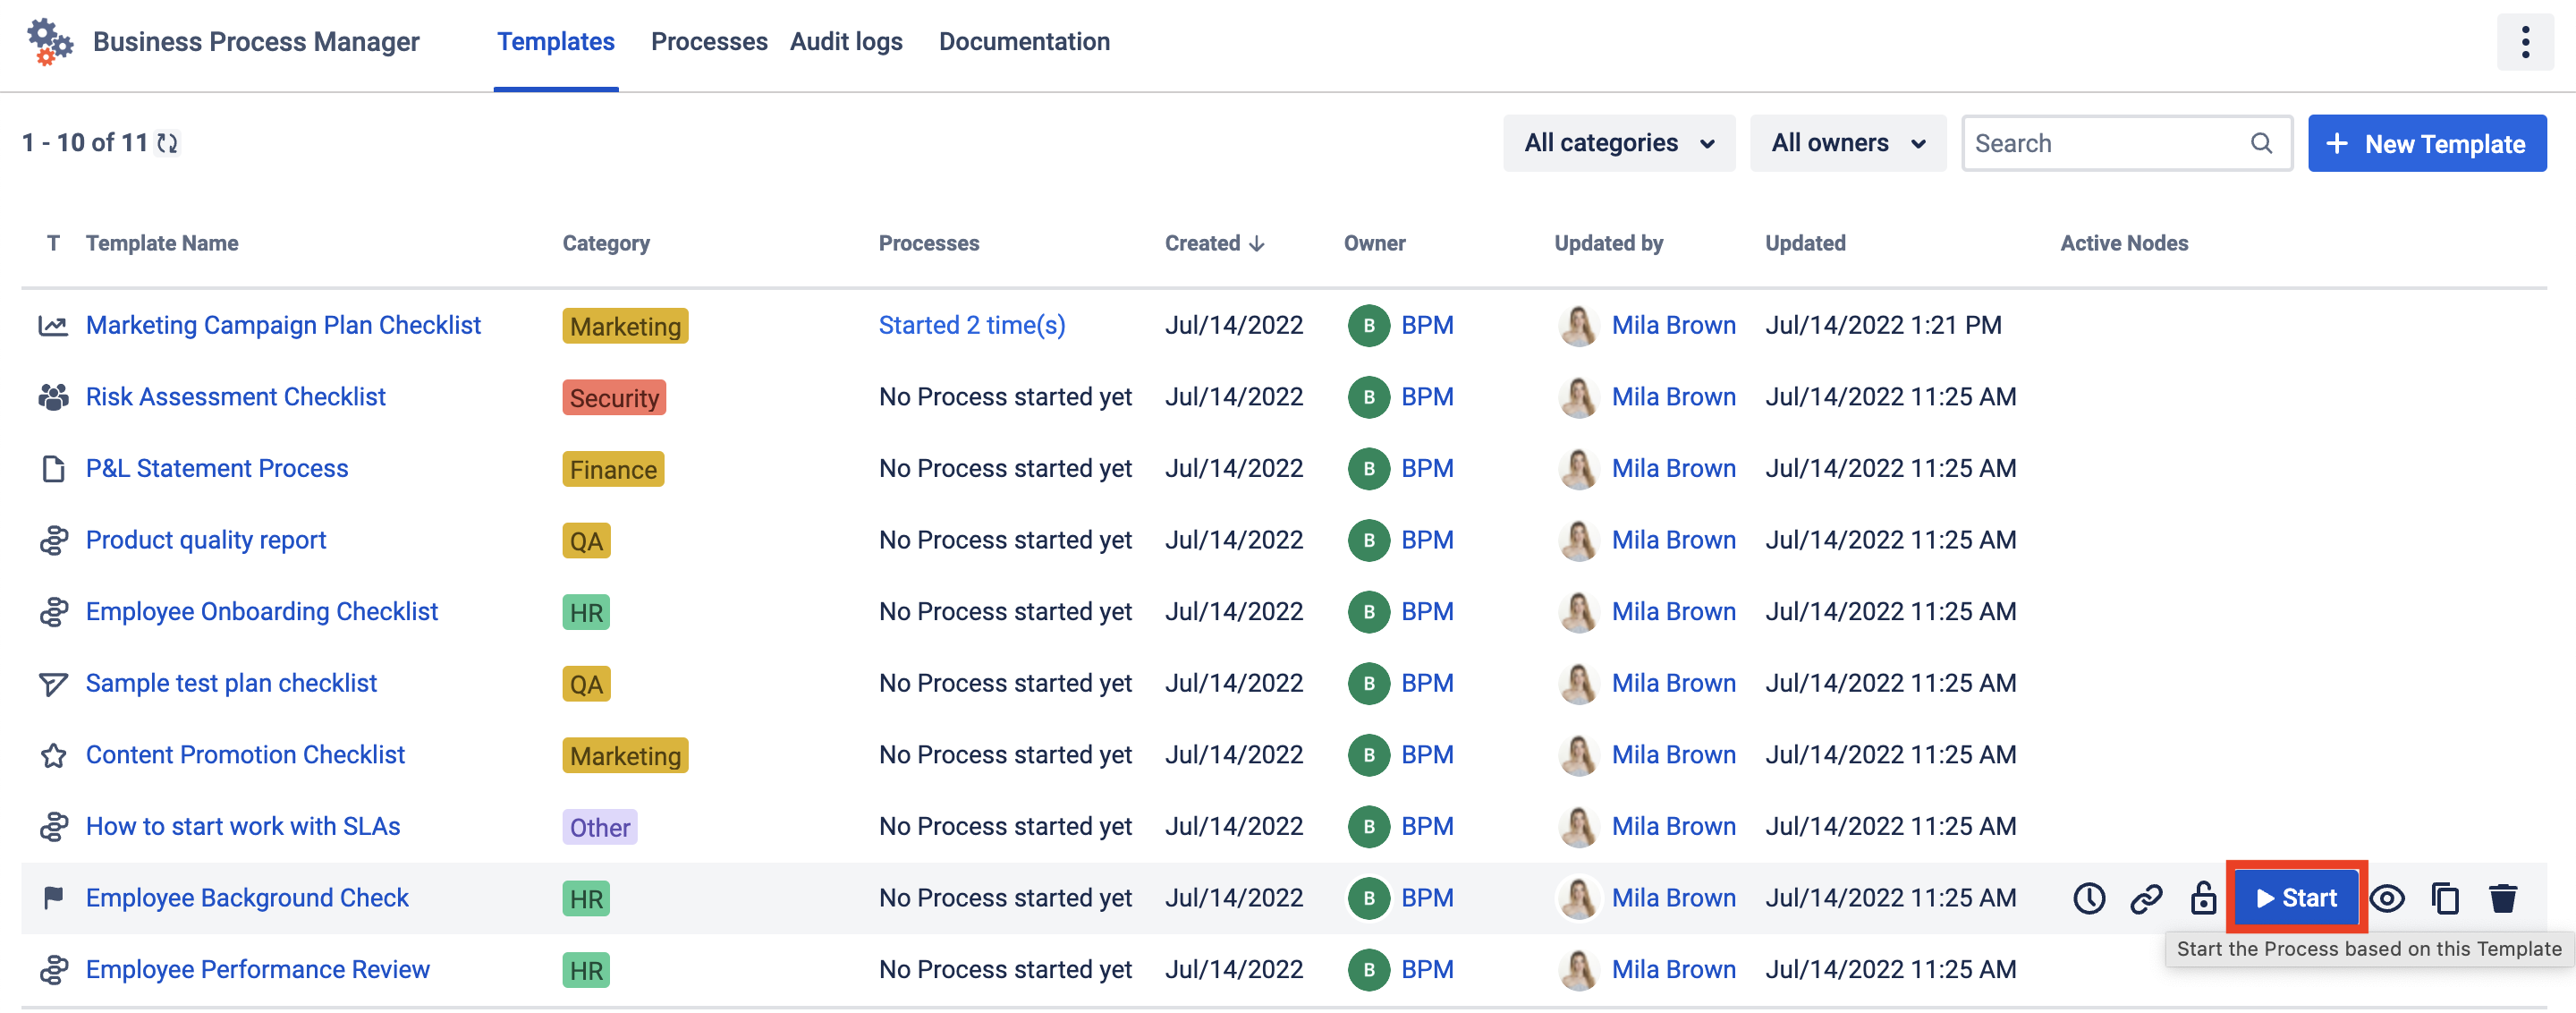
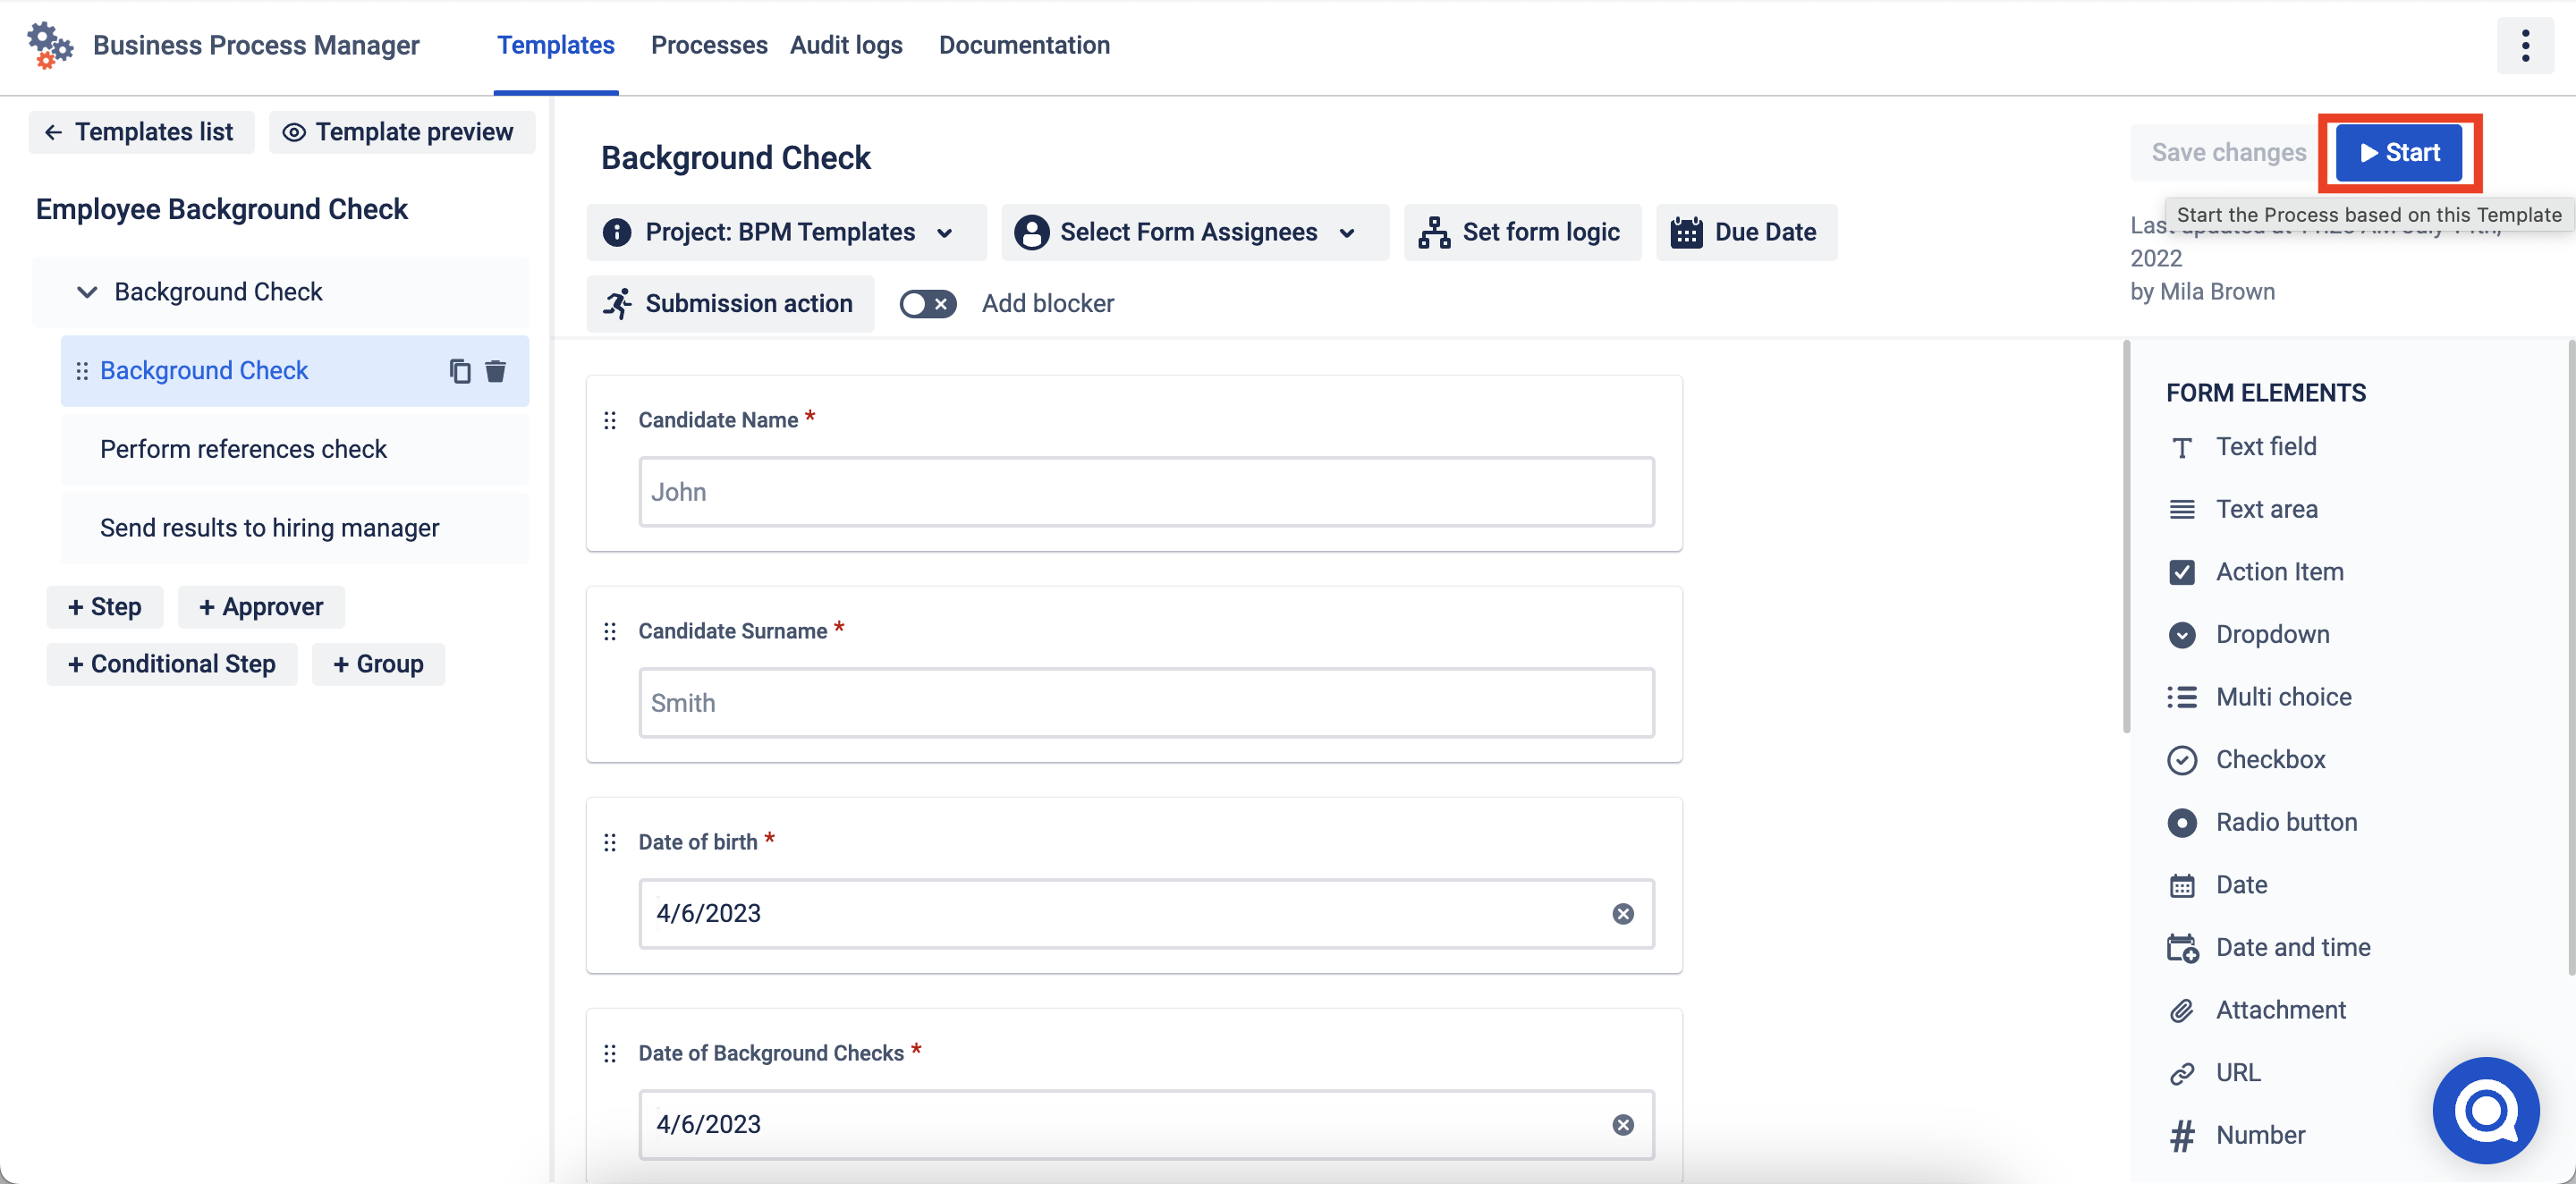
Once a Process is ready, click the Start button on the Template Grid or in the Template edit window.
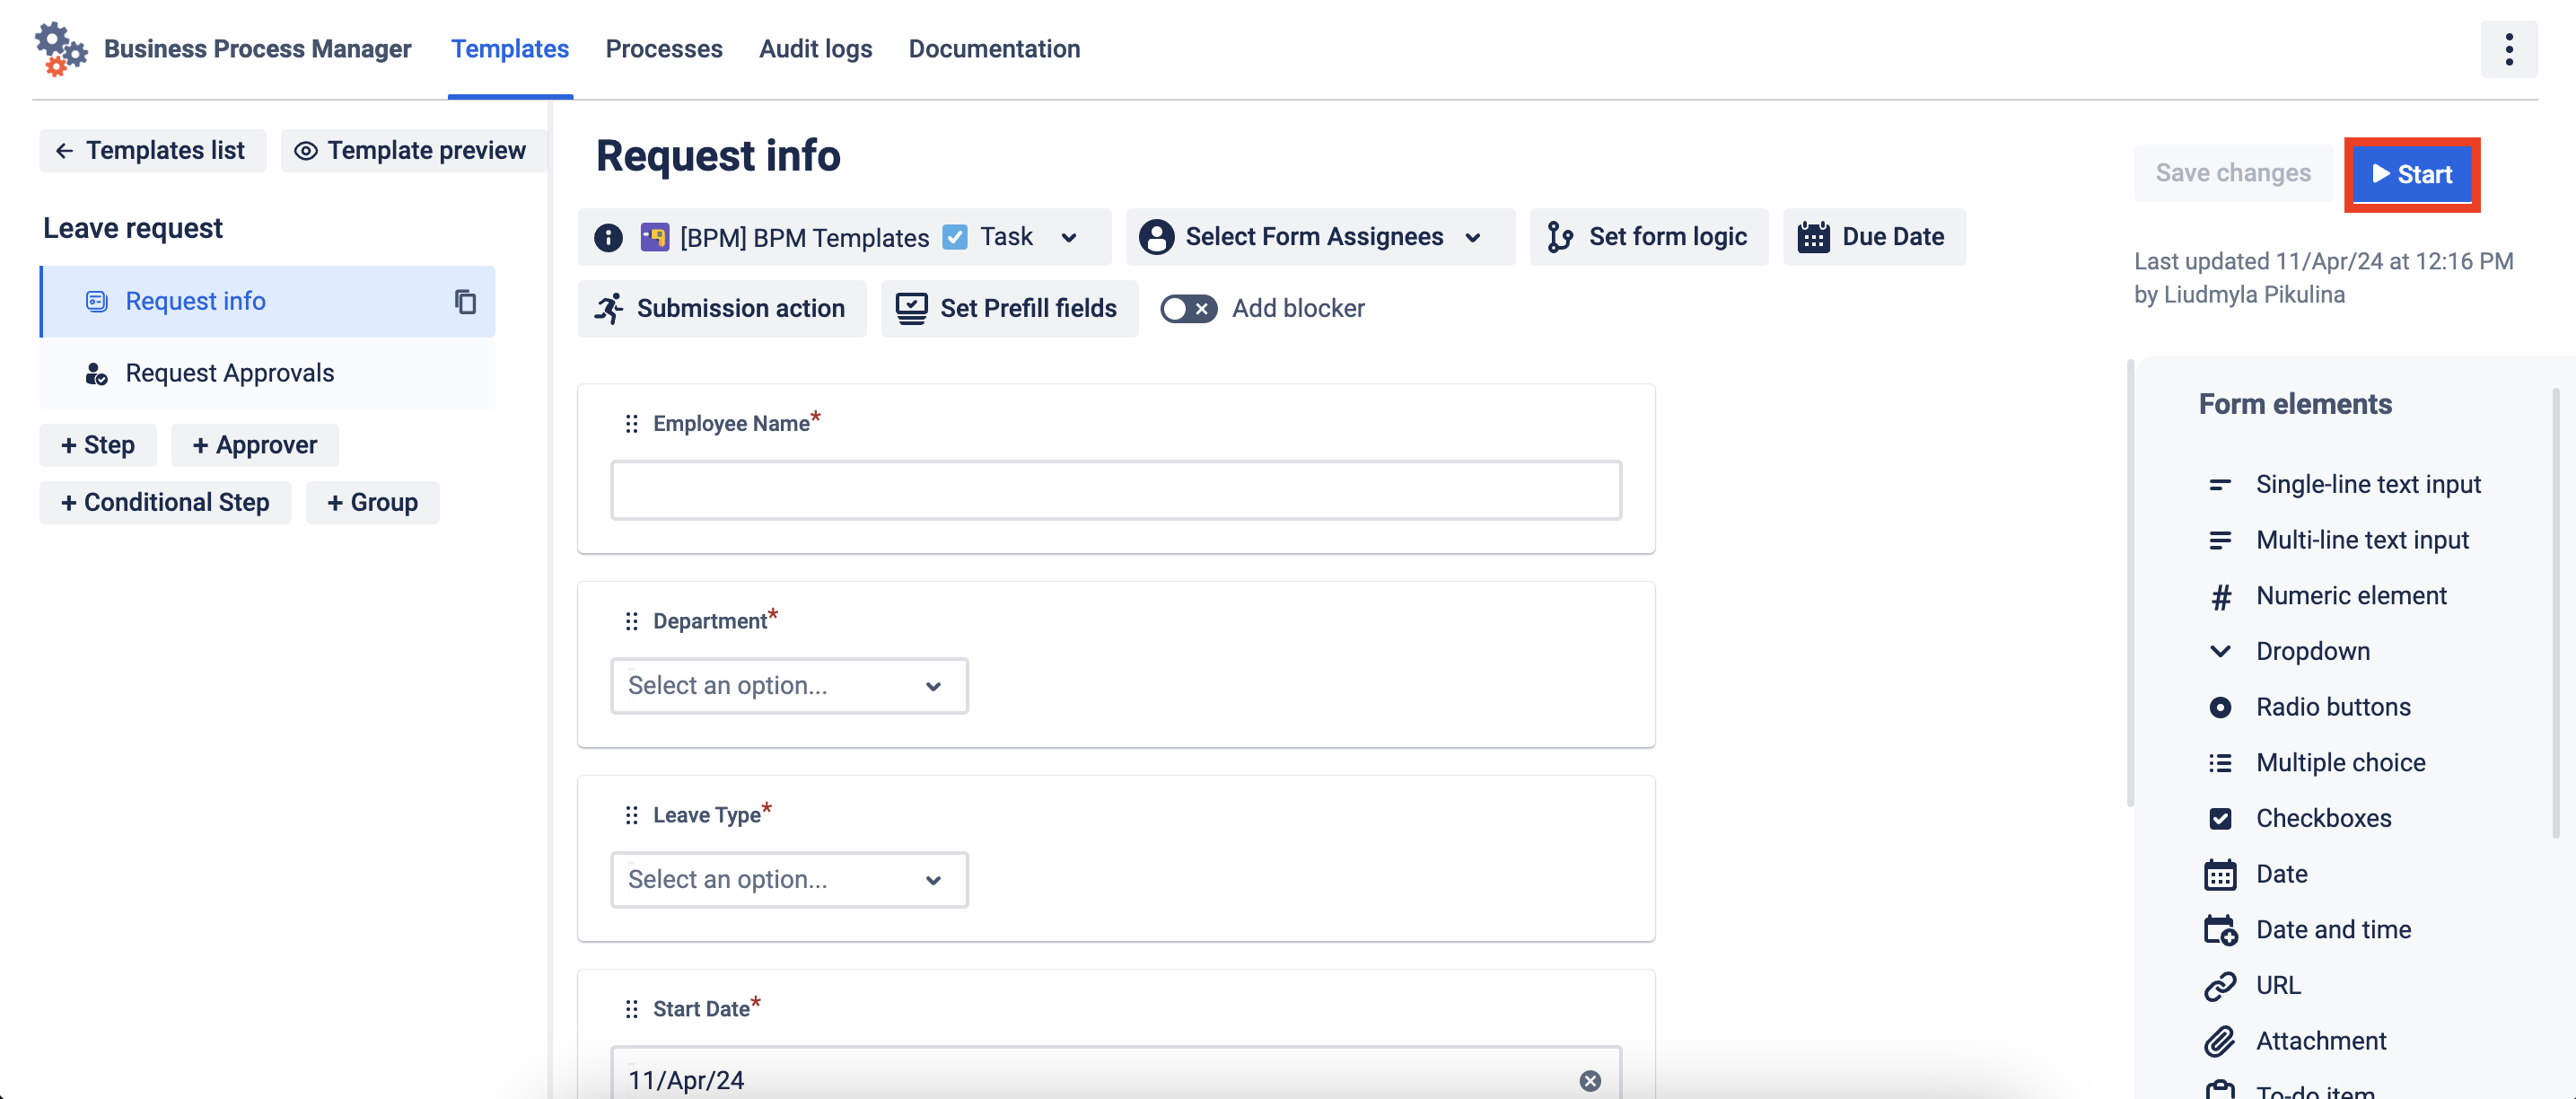
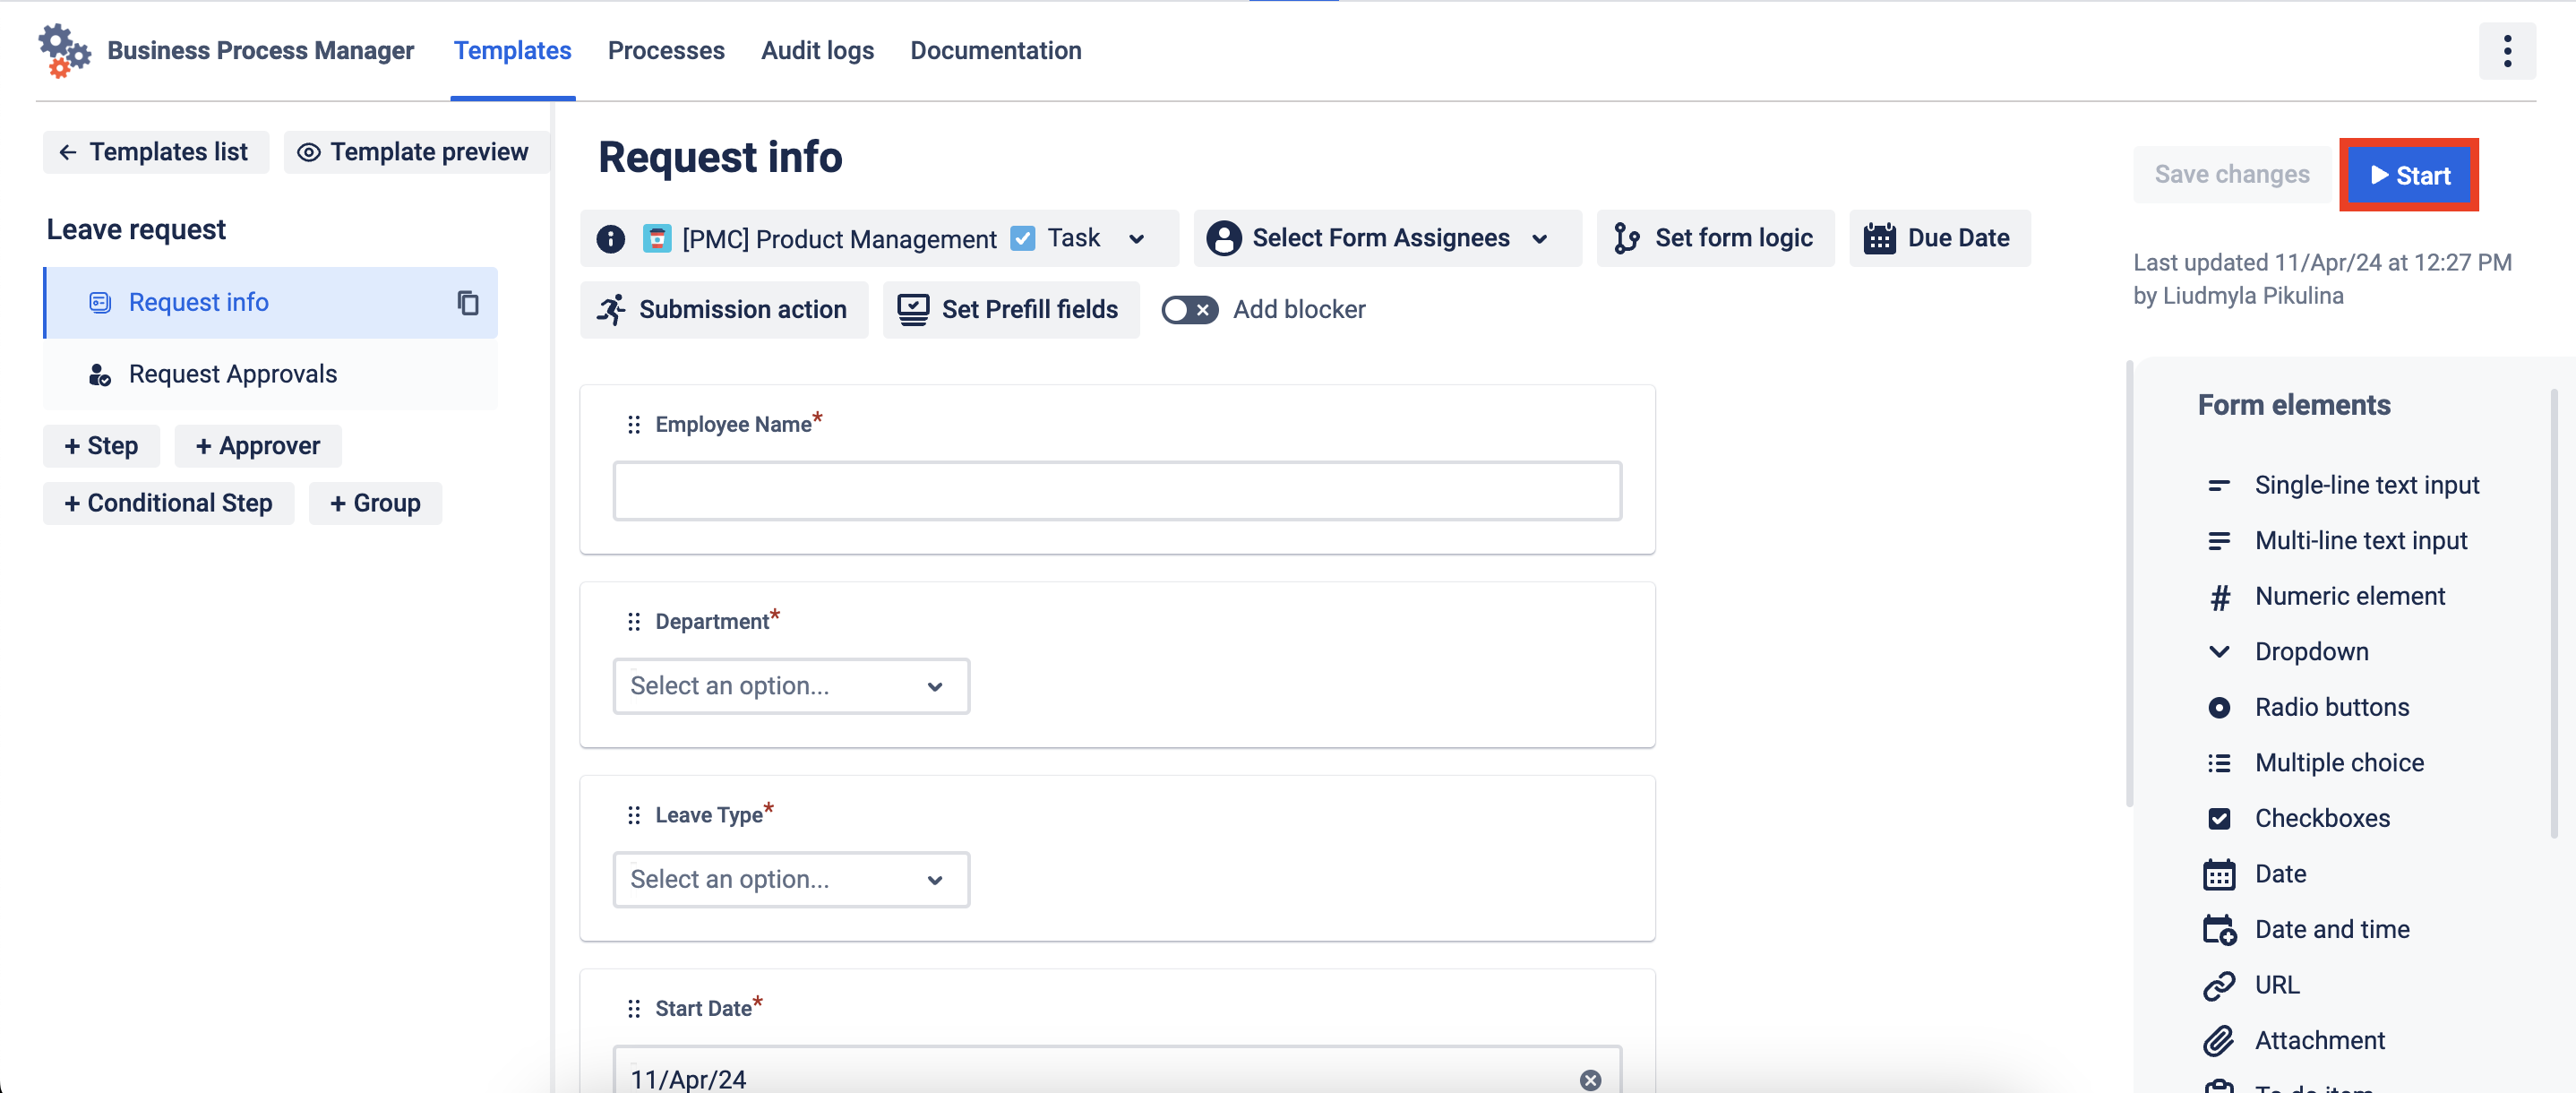
Set assignees and approvers for a single process start.
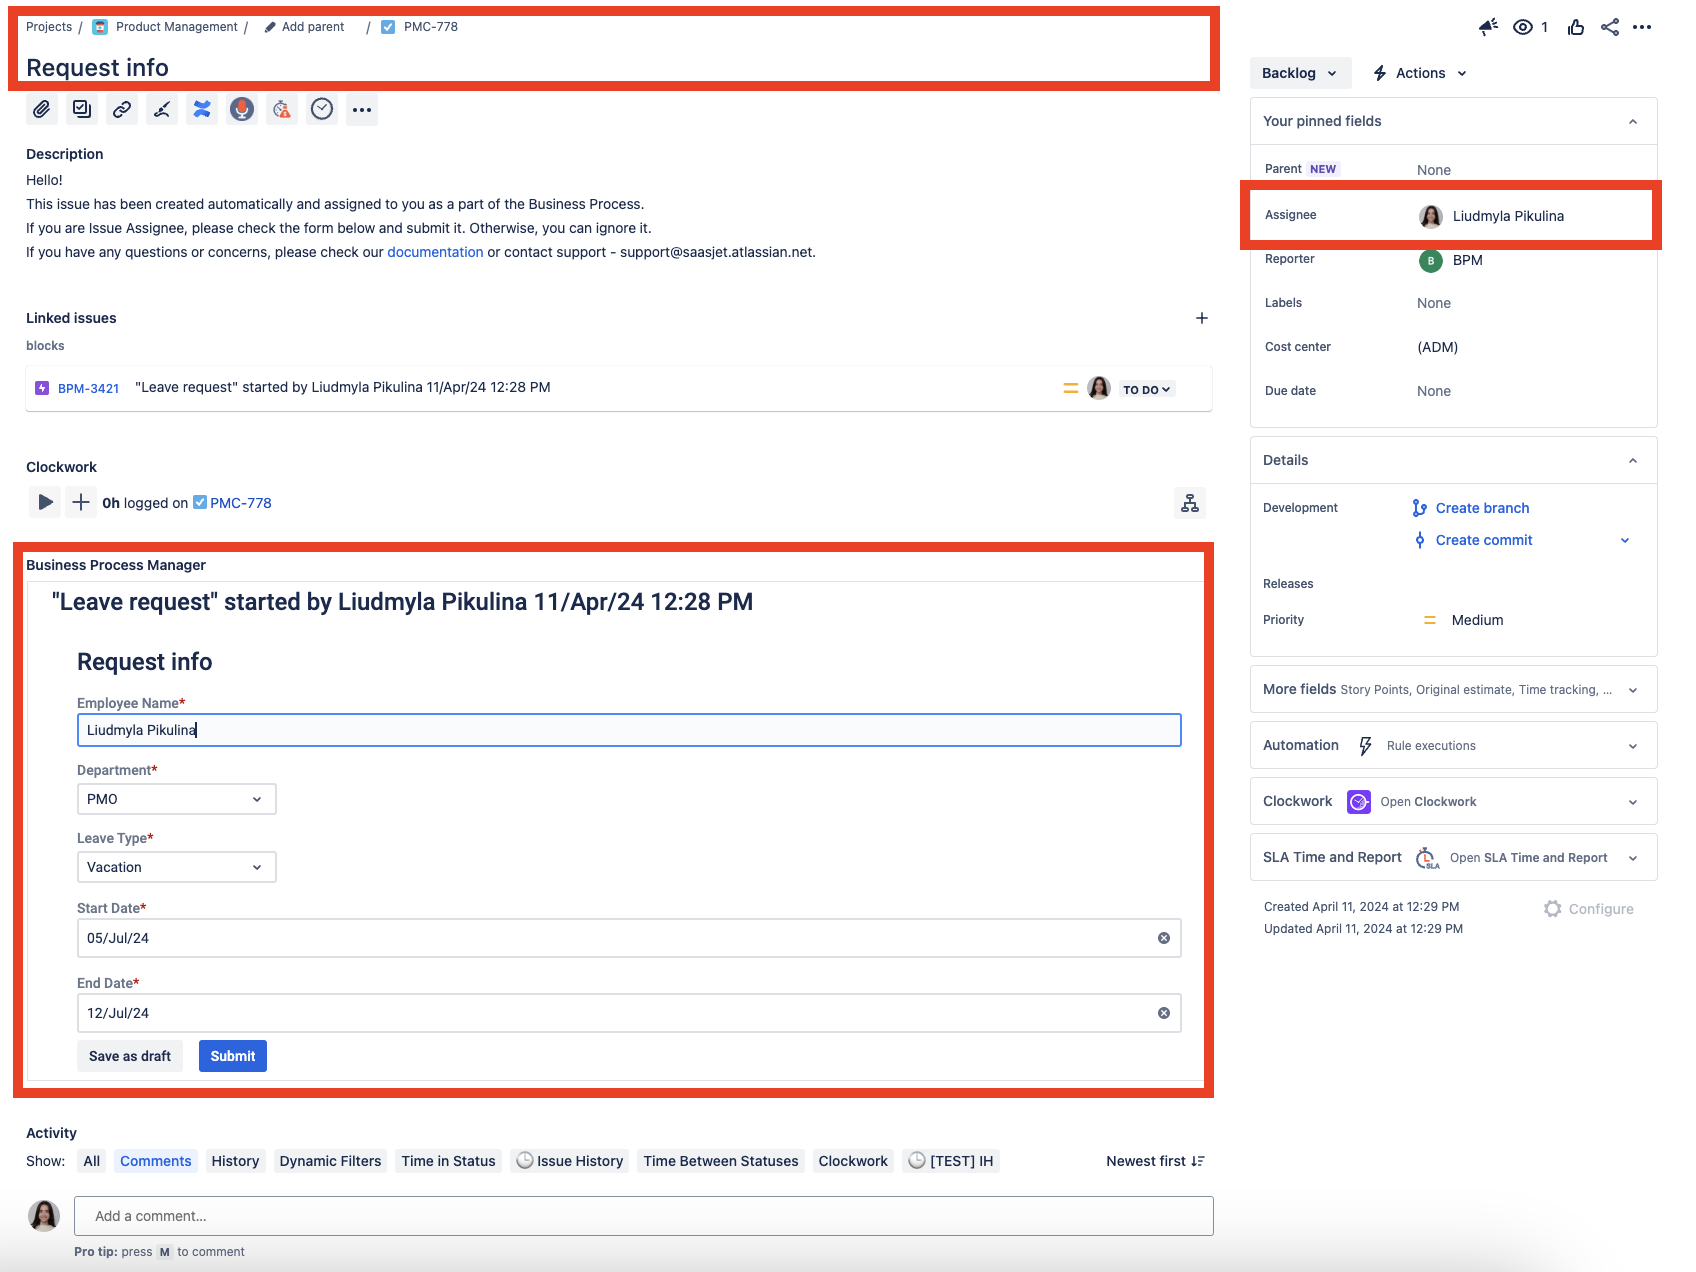
This automatically generates issues for each step or assignee in the process and creates a new epic that links all the issues together.
Each task has its own assignee, project, and necessary form to be filled in.
It is important to note Note that each form can be submitted only once. Then the system displays the entered data in the respective issue.
To view submitted form data, click the Show submitted form data button. However, please note that this information cannot be edited once it has been submitted.
...
| Panel | ||||||||
|---|---|---|---|---|---|---|---|---|
| ||||||||
| Info |
|---|
Questions? Just email us to get an answer support@saasjet.com. |
| Tip |
|---|
Haven’t used this add-on yet, then try it now! |