Let’s consider a situation:
A team has a huge amount of simultaneous issues to do, queries are in “waiting” status and there is no solution to track the team performance and working efficiency. To keep the deadline and project flexibility, you should set up an effective process monitoring system.
Cycle time is the time from the beginning to the end of a certain action. It is the time during which the issue is marked as In progress.
Lead time means a longer period: from receiving a request for an action to the moment this action is completed (including the time in the queue).
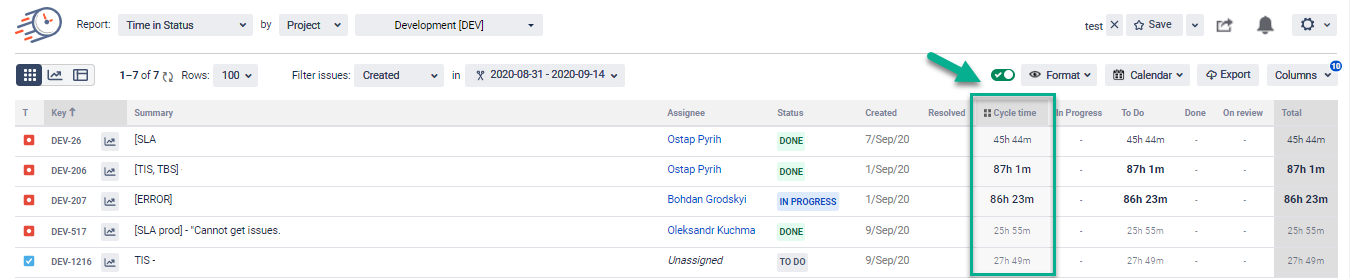
Time in Status for Jira Cloud lets you get Cycle and Lead time by setting the Status Groups. You can configure it in the Column Manager with the statuses drop-down list. You have the ability to choose statuses that you want to include in Cycle or Lead Time in your workflow.
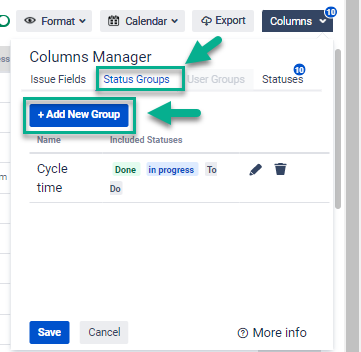
In the Columns choose Status Groups;
Click Add New Group;
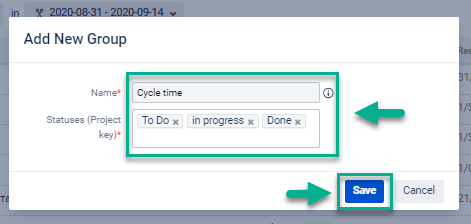
3. Select statuses;
4. Write down Group Name (Cycle or lead);
5. Click a Save button;
You can customize your reports with Cycle or Lead Tіme:
Choose the necessary issue list from projects, sprints, apply flexible filters with tags.
Set the appropriate date range and data format.
Exclude non-working hours from the Cycle or Lead Time calculation with a multi-calendar.

You can use such report types for Cycle or Lead Time as:
Average Cycle or Lead Tіme (in the Average time report),
Cycle and Lead Time for every assignee (in the Assignee time report),
Cycle or Lead Tіme per Date (in the Time in Status per Date report),
Status Count — how many times the issue was in the Status Group statuses.
Monitoring reports in details allows exporting data to Excel or Google Sheets (XLSX or CSV formats).
Haven't used this add-on yet? Try it now >>>