Using an Approver step, you can streamline any processes that are accepted by another person. Set up a flexible approval workflow without any coding in sequential or multi-stage order.
Get supervision from the individual user or groups of users with Approve/Reject functions.
How to create the Approver step?
First of all, create a Process Template or select an existing one. Then click the +Approver button.
At the Approval setting, name your step and select the Step that needs to be approved as shown below.
Then you need to choose the Step (Jira issue) that should be approved. Click on the radio box tab to select the step.
Click Approval Step Settings to select individuals or groups of users to approve the process. Click the button to add selected user/s to the Approval order. When all the necessary users are added - confirm the settings.
In that case, Approvals will be added in the same order you have chosen.
Every step creates the issue that will be assigned to the required approvers.
All selected Users will see Approve & Reject buttons on the Form.
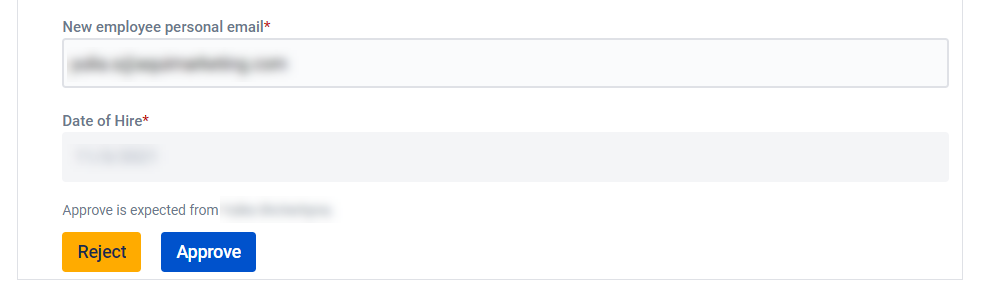
If you have added multiple approvers, the assignee of the issue will change according to the need for approval.
If you add the Group, the issue will be assigned for approval to every member of a particular group.
When a person makes a choice to Approve/Reject, the system will add a comment to the issue. So you’ll get an email&Jira notifications about changes in the task.
How to build the Approval process with conditions?
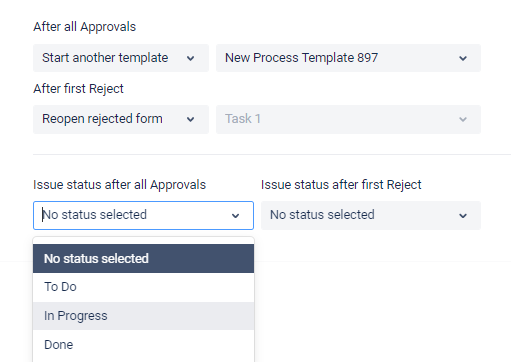
If the supervision requires additional conditions and actions, use the following settings once the Step is approved or rejected.
After every Approval are received | Start another Template | Once all Approvers are received, the system will start the selected Process. The existing Process will continue running according to its settings. |
Start Conditional step | Once all Approvers are received, the system will trigger the selected Conditional step. | |
Once the first Reject is received | Start another Template | Once the form is Rejected, the system will start the selected process. The existing Process will continue running according to its settings. |
Reopen rejected form | The system will reopen the form if rejected. So, the process participants will be able to redo the job. | |
Start Conditional step | Once the form is Rejected, the system will trigger the selected Conditional step. |
As a Process owner, you can also set up the changes to the workflow. So, the issues will be moved to the selected status once all Approvals or first Reject are received on the particular Step.
When a person makes a choice to Approve/Reject, the system will l add a comment to the issue. So you’ll get an email&Jira notifications about changes in the task.
Questions? Just email us to get an answer support@saasjet.com.
Haven’t used this add-on yet, then try it now!>>>