Welcome!
The description below will help you to learn more about all the SLA Time and Report features.
We've prepared this short video to help you understand how everything works in SLA Time and Report and how to set up your first SLA!
1. Go to the installed add-on
First of all, find the installed "SLA Time and Report" add-on below the Jira settings menu item. Click to open the add-on.

2. SLA Configurations
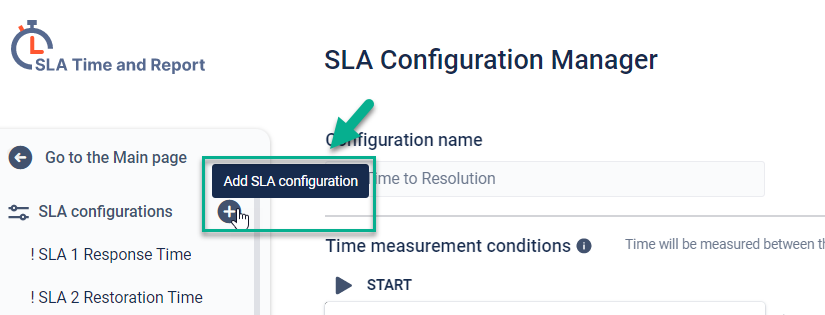
Go to the SLA configuration menu to create a new SLA timer.
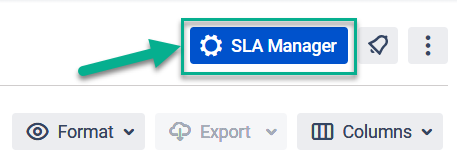
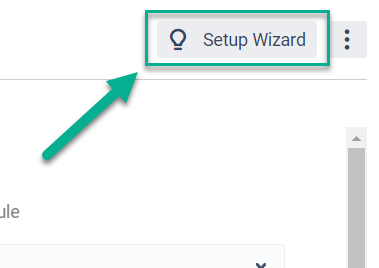
If you need some instructions or tips on how to set up SLA, you can follow the instructions from our Step by step SLA Wizard to understand how to work with SLA Time and Report. Our wizard will help you to set up an SLA step by step. To use this option, firstly click “SLA Manager” and afterward click the “Setup Wizard” button.
Note: if you are a new user, you will meet our Wizard as soon as you open the SLA configuration menu for the first time. It will show up automatically.
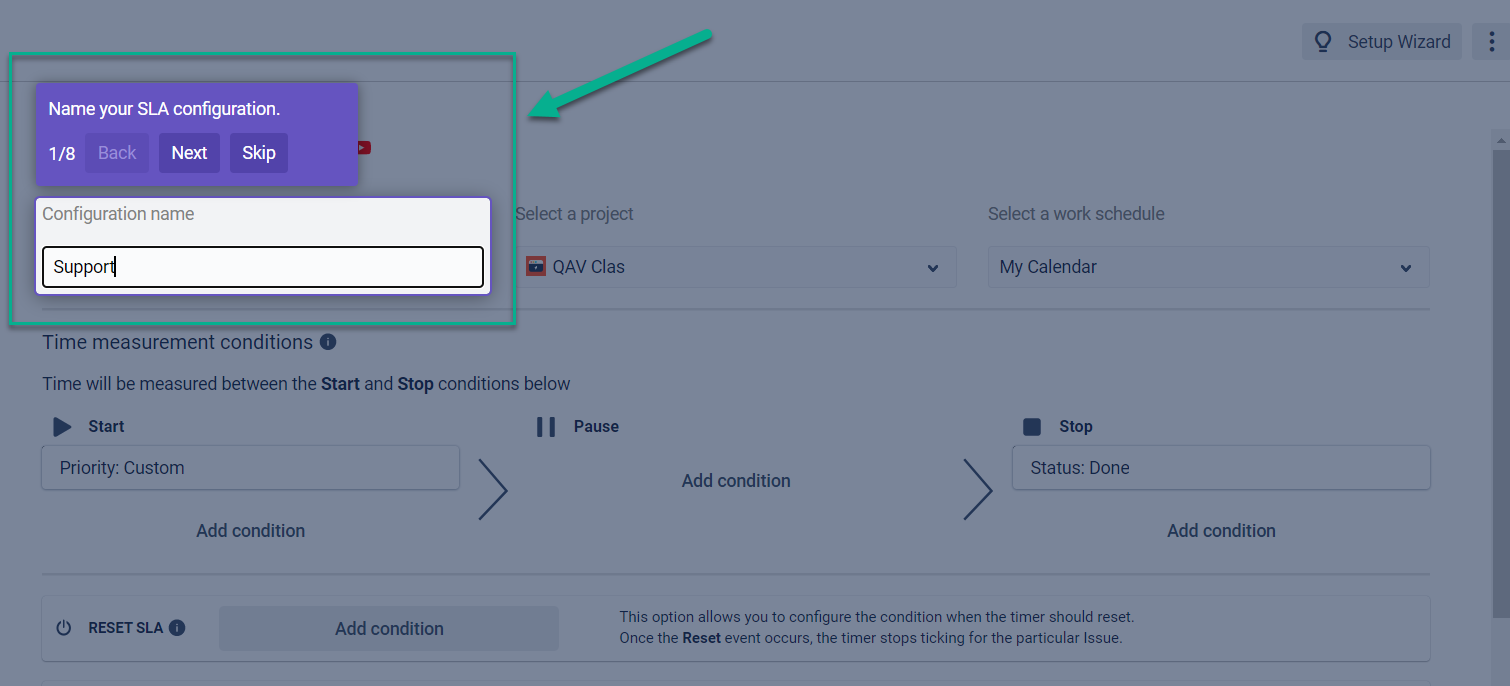
Follow the steps shown by our Wizard to create your SLA.
Or just click the “+Add new” button to start the creation of a new SLA configuration.
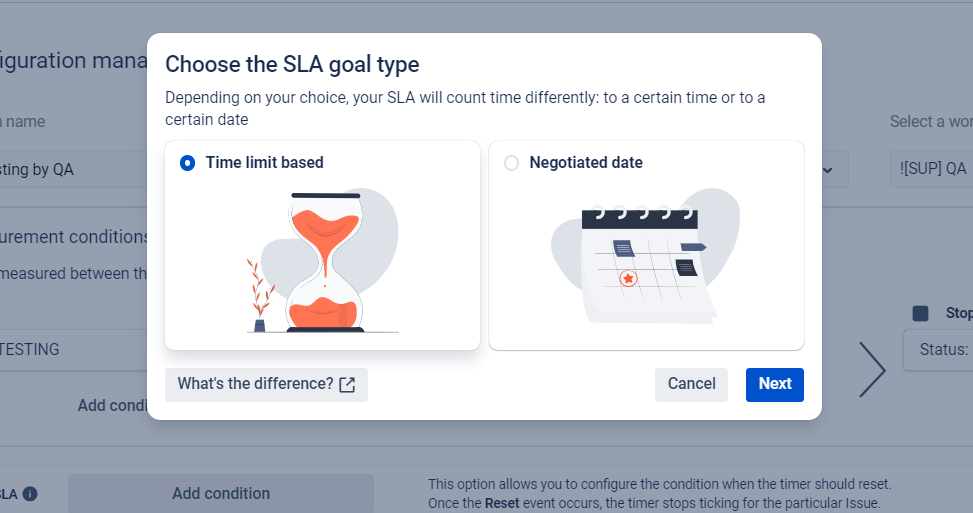
Select what type of SLA Goal you want to use for the new SLA config. It can be based on a time limit or a negotiated date (read more here).
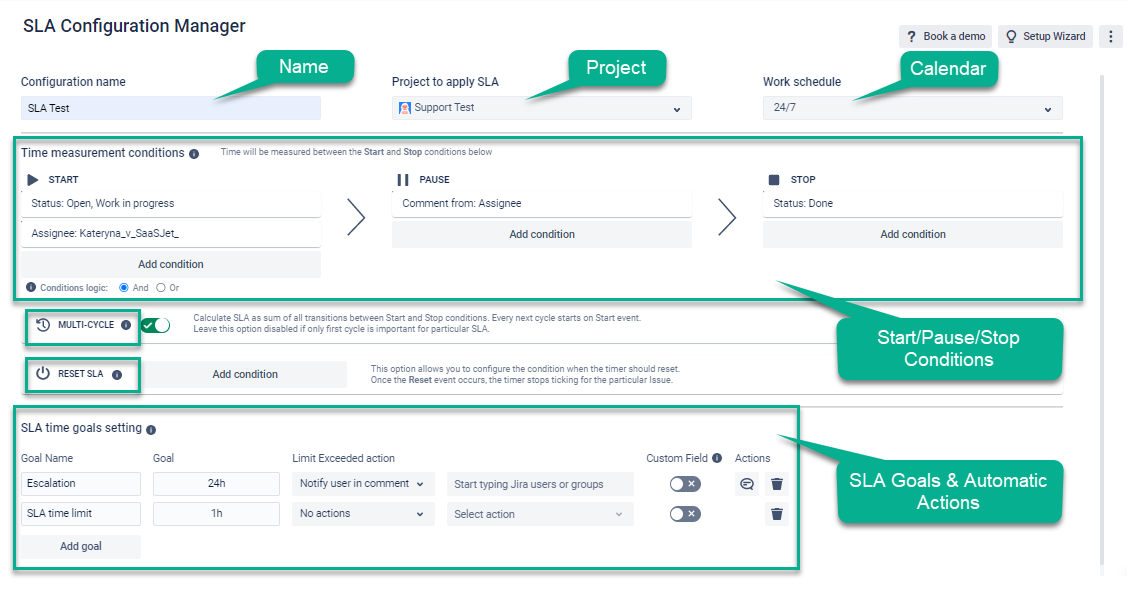
Then you can configure other parameters for the new SLA config:
Name
Project
Calendar
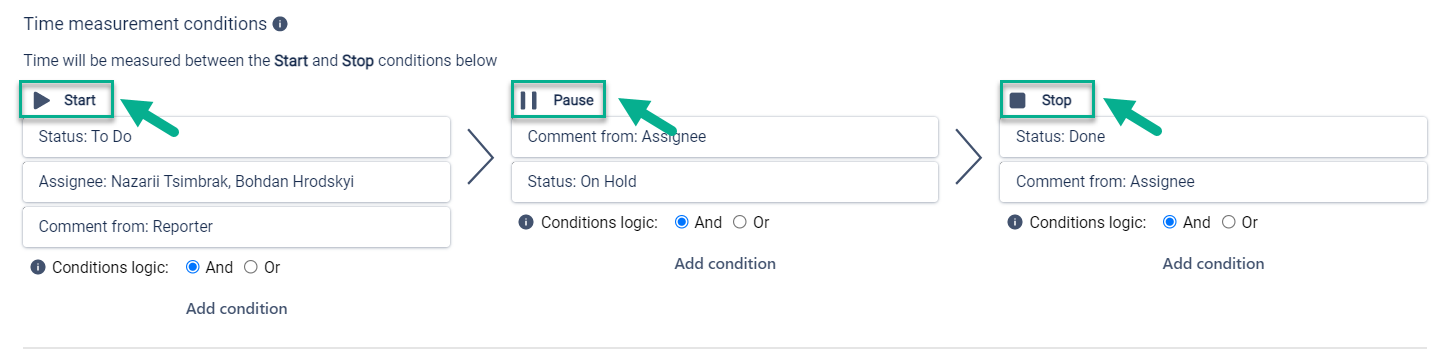
Start/Pause/Stop conditions
SLA Reset
Multi-Cycle option
SLA Goals settings with automated actions
Pay attention that Pause condition, First/Multi-cycle options and SLA Reset are disabled for SLA configs with the negotiated date.
At Start/Stop/Pause conditions, you can choose standard and custom issue fields, which are used by your team for each project.
Further, you can add conditions for SLA Reset and select the Multi-Cycle option to get the cumulative sum of all cycles' duration between origin and end statuses.

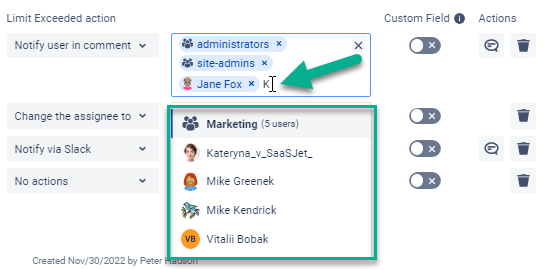
At the SLA goals setting menu you can specify SLA goals (time limit or negotiated date) and choose the Automate action for exceeded issues:
notification
changing reporter
changing priority
changing status
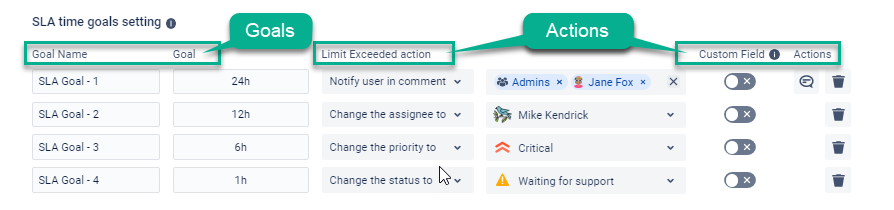
You can choose an option to notify users separately or/and a group of users in comments about exceeded issues. If you have many users, use the Search field.
After setting, you need to save all configurations.
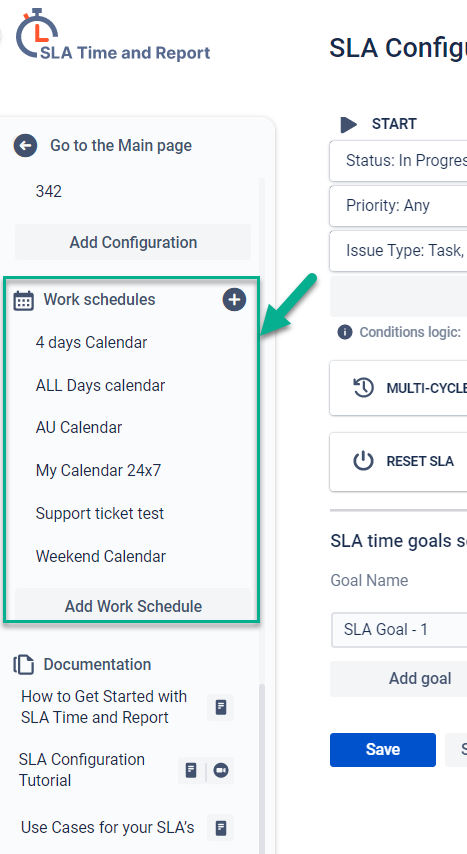
Also, on the left side menu, you can see a list of SLAs and Work schedules, configured before. You can add the new ones, copy or delete them. Read more about setting the Work schedules here.
3. Report generation
For reporting, you can filter a list of issues based on which you’ll get SLA data analysis. You can filter by such options:
1. Project, Assignee, JQL, Filter, Label, Reporter, Sprint;
2. SLA Config;
3. Status of SLA Timer: In progress, On Pause, etc.
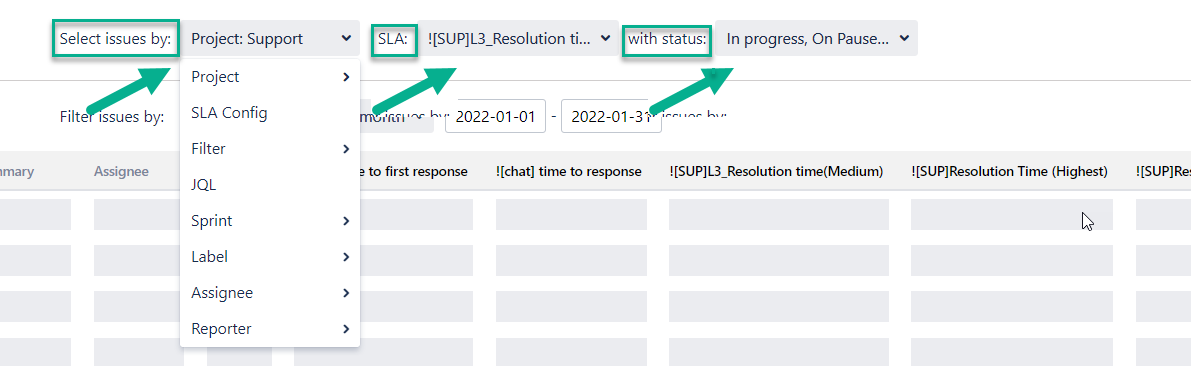
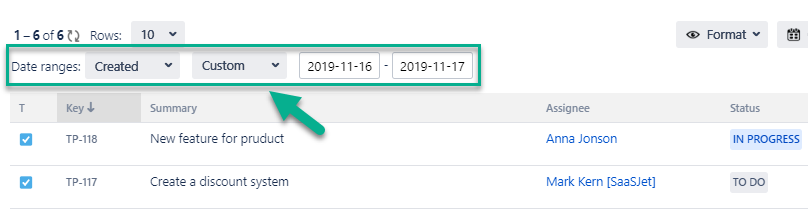
Filtering by Date range is available too.
4. SLA Time Reports
Table View
According to the settings configured before, you will get ready SLA time report. You can change it at any time.

Also, you can see % of completion SLA to the target date, just click the SLA timer to see full details of your SLA.
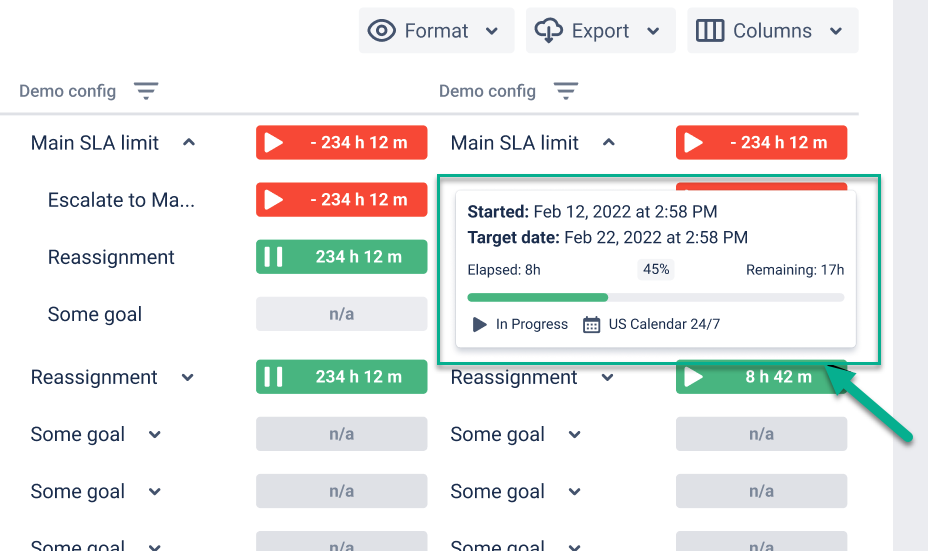
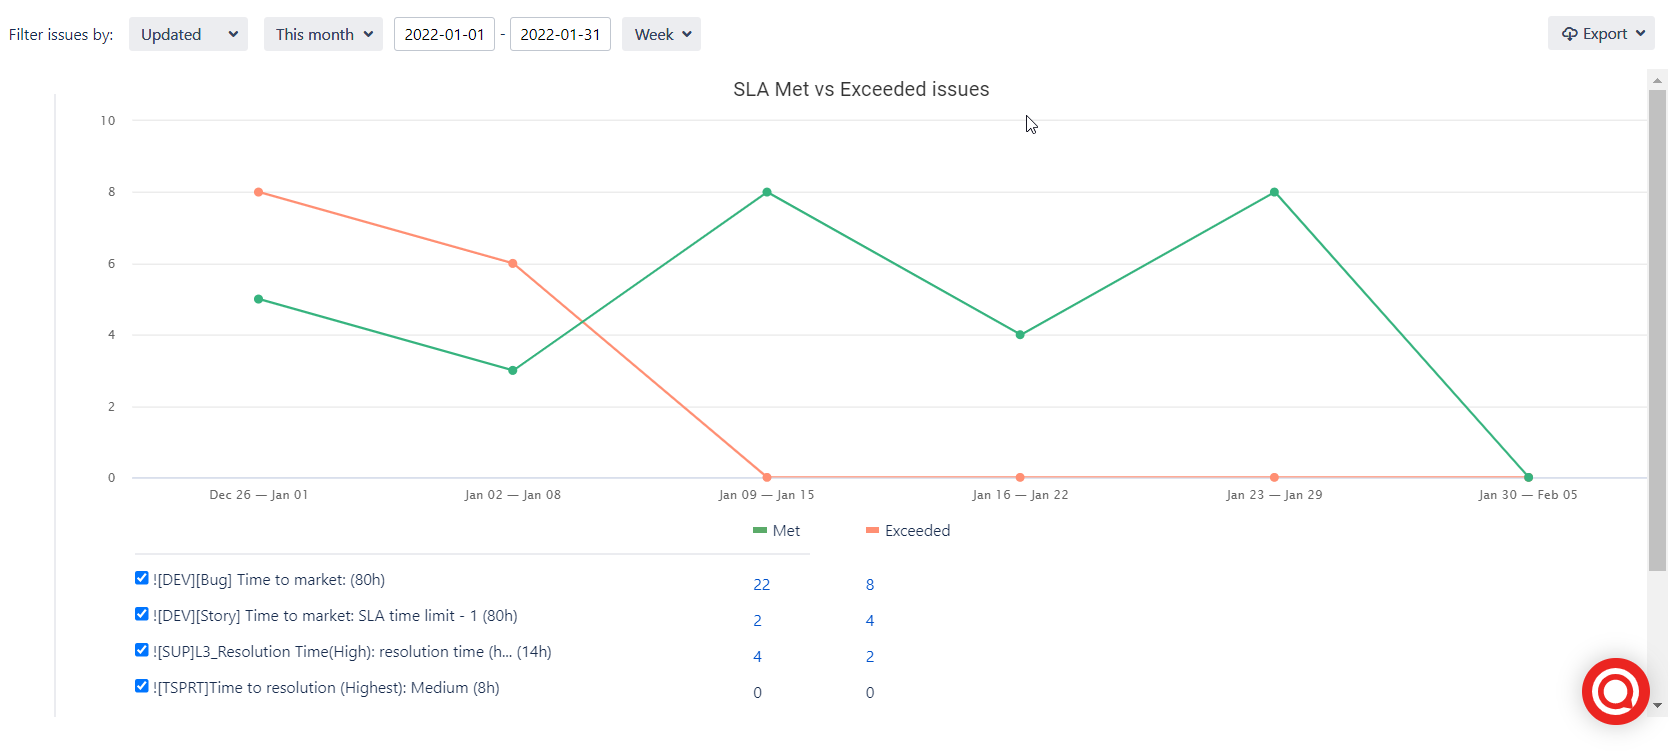
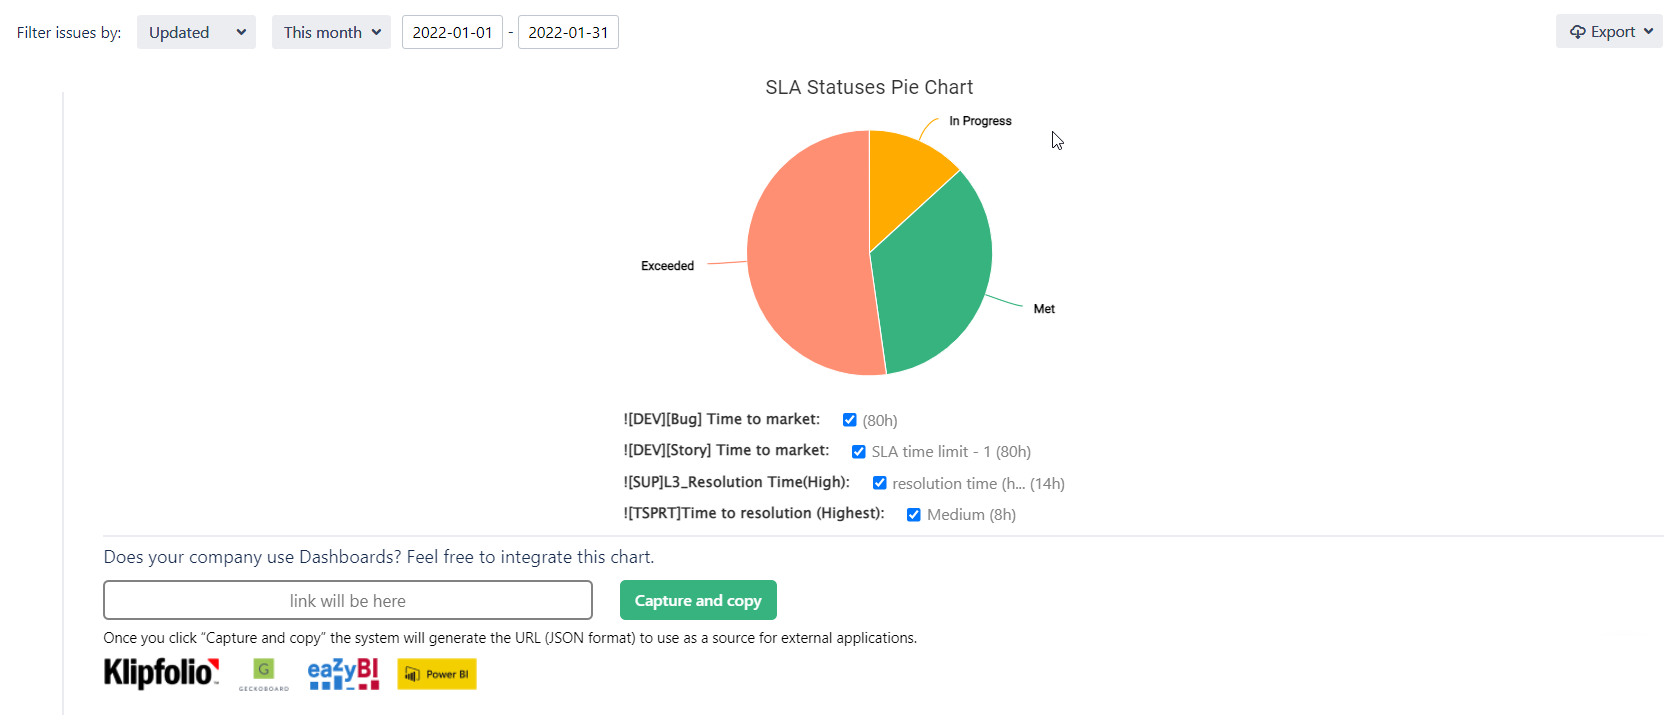
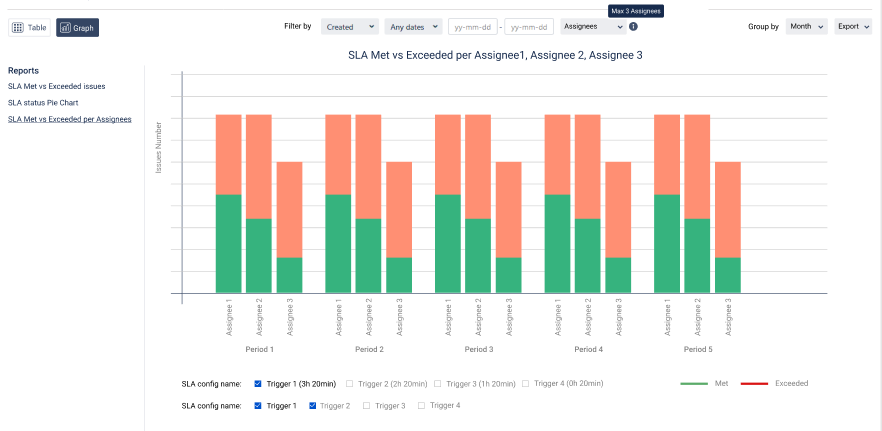
Chart View
You can also monitor SLA status data of Met/Exceeded and In progress issues in 3 Graph views.
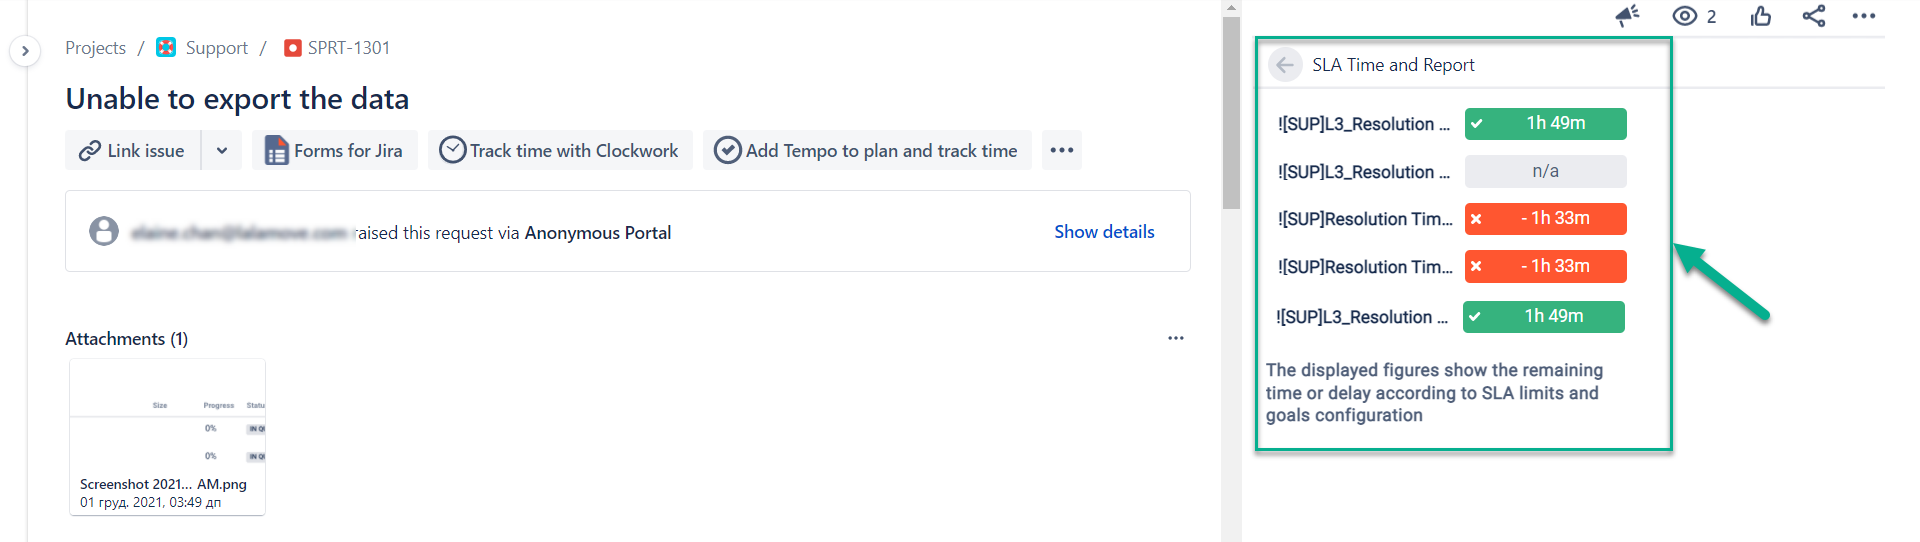
Track SLA on Issue Tab
You can view time to SLA at each issue panel - just click the “Open SLA Time and Report” button.
5. Data Export
Export SLA data as XLSX or CSV files and analyze it using such tools as Excel or Google Spreadsheets.
Please note: in order to extract data for analysis, please choose one of the Decimal time formats. It will enable you to perform calculations on the exported data and build charts.
Support
If you need any help or have questions, please contact us through SaaSJet Support or via email support@saasjet.atlassian.net
Also, you can choose Documentation, Request a Feature, Report a Bug and Submit support ticket in the configuration menu at the application.
Haven't used this add-on yet, then try it now!