You are viewing an old version of this page. View the current version.
Compare with Current
View Page History
« Previous
Version 31
Next »
Content
Form element settings table
Instruction on how to set up Form elements settings
Form elements settings table
Use Form elements and Content blocks to build the most useful form for filling out. Here are some settings for each element so that you can make it more convenient for your needs.
Form elements |
Element name | Using and purpose | Settings |
|---|
Text field, URL, Number | Use it for a simple online response. E.g: Name, Surname, Location, Link, Mobile phone, etc. | Response required: yes, no. Field label and Help text settings. Characters limit settings. Destination issue field: all text fields are available to set the field submission result. Related URL. The User can provide the URL that will help to get more information on how to submit the Text field.
|
|---|
Text area | Use it for multiple lines of text, detailed explanations, or comments. | Response required: yes, no. Field label and Help text settings. Characters limit settings. Destination issue field: all text fields are available to set the field submission result. Related URL. The User can provide the URL that will help to get more information on how to submit the Text area.
|
|---|
Dropdown, Radio button | Use it for a single option selection. E.g: Company department, Cost center, City. | Response required: yes, no. Field label and Help text setting. Adding custom options to the list. Destination issue field: all text and label type fields are available to set the field submission result. Related URL. The User provides the URL that will help to get more information on how to submit the Dropdown or Radio fields.
|
|---|
Multi choice, Checkbox | Use it for selecting more than one option from the list. | Response required: yes, no. Field label and Help text settings. Adding custom options to the list. Destination issue field: all text and label type fields are available to set the field submission result. Related URL. The User can provide the URL that will help to get more information on how to submit the Multi choice or Check list. Create dynamic form using Form Logic
|
|---|
Date | Use it to propose assignee submit a specific date from the date picker. E.g: Release date, Hired date. | Response required: yes, no. Field label and Help text settings. Destination issue field: all date type fields are available to set the field submission result. Related URL. The User can provide the URL that will help to get more information on how to submit the Date fields.
|
|---|
Date and Time | Use it to propose assignee submit a specific date and time from the date and time picker. E.g: Meeting time, Client visit time. | Response required: yes, no. Field label and Help text settings. Destination issue field: all date and time type fields are available to set the field submission result. Related URL. The User can provide the URL that will help to get more information on how to submit the Date & Time fields.
|
|---|
Attachment | Use it to provide the ability to upload multiple files to the form assignee. E.g: Uploading quotes for expenses approval. Once uploaded, documents will be added to the Issues attachments. | Response required: yes, no. Field label and Help text settings. Related URL. The User can provide the URL that will help to get more information on how to Attach files.
|
|---|
Action Item | Use it to create checklist in forms. | Response required: yes, no. Adding custom options to the list. Related URL. The User can provide the URL that will help to get more information on how to submit the Action Item.
|
|---|
Content blocks |
|---|
Element name | Using and purpose | Settings |
|---|
Header | Use it to highlight and visually separate form elements. | Max - 250 characters |
|---|
Paragraph | Use it to provide more information or requirements to Form Assignee of how to fill it better. | Max - 2000 characters. |
|---|
Embed | Use it to upload Youtube video or Image directly to the form. | Add Website Embed URL |
|---|
Horizontal line | Use it to separate the form elements. | |
|---|
Instruction on how to set up Form elements
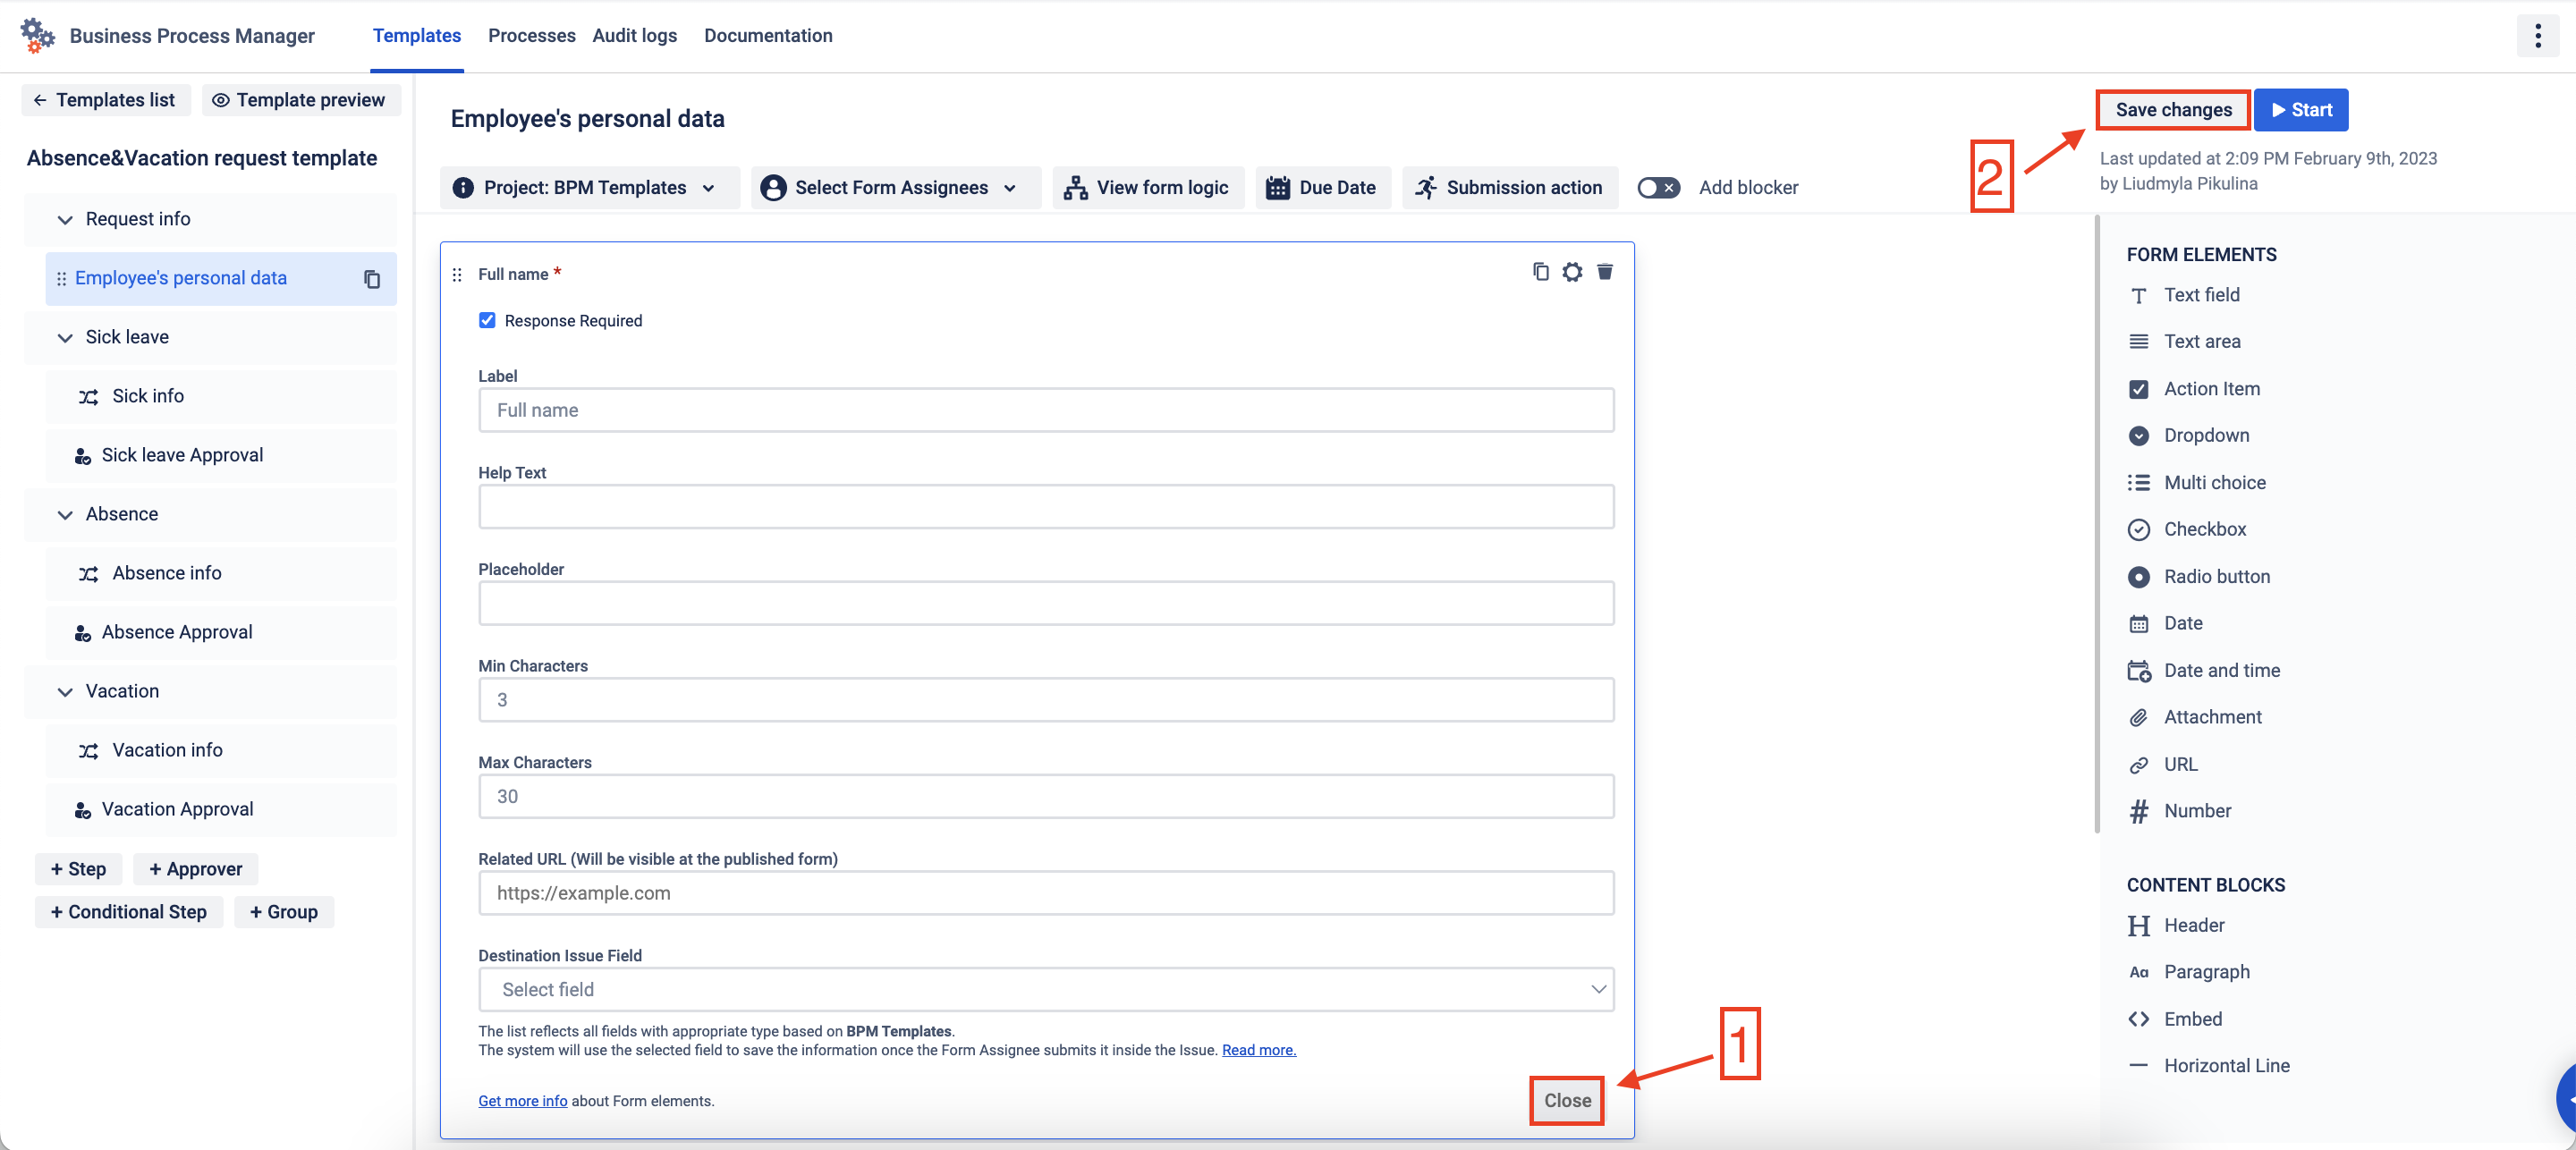
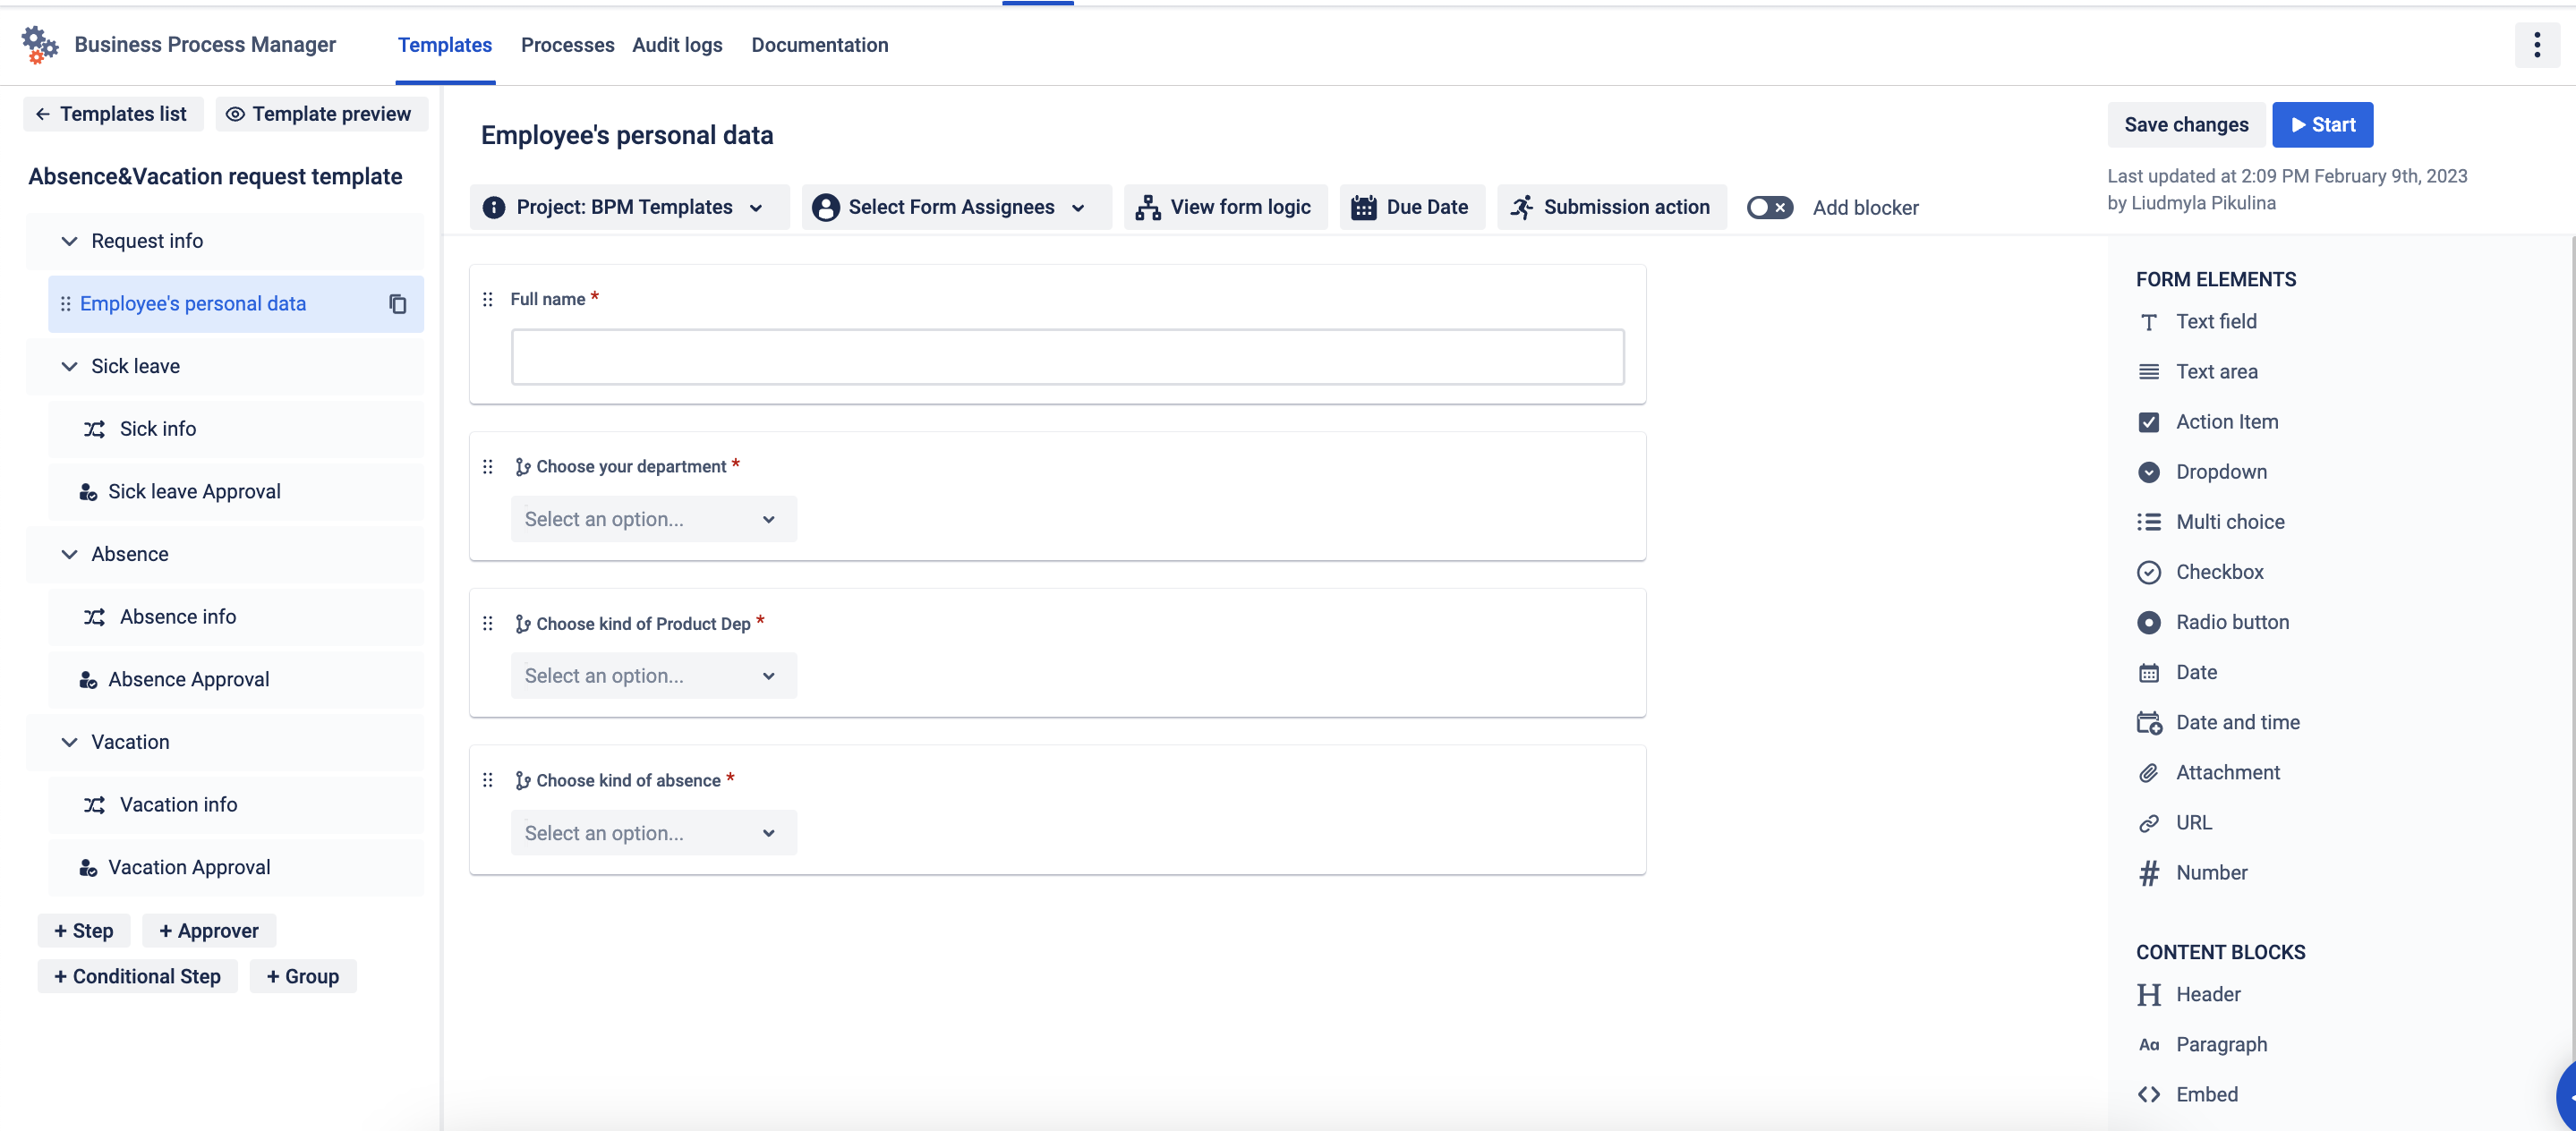
Build the form for step using typical Form elements and content blocks. Simply drag&drop elements to the Form workspace.
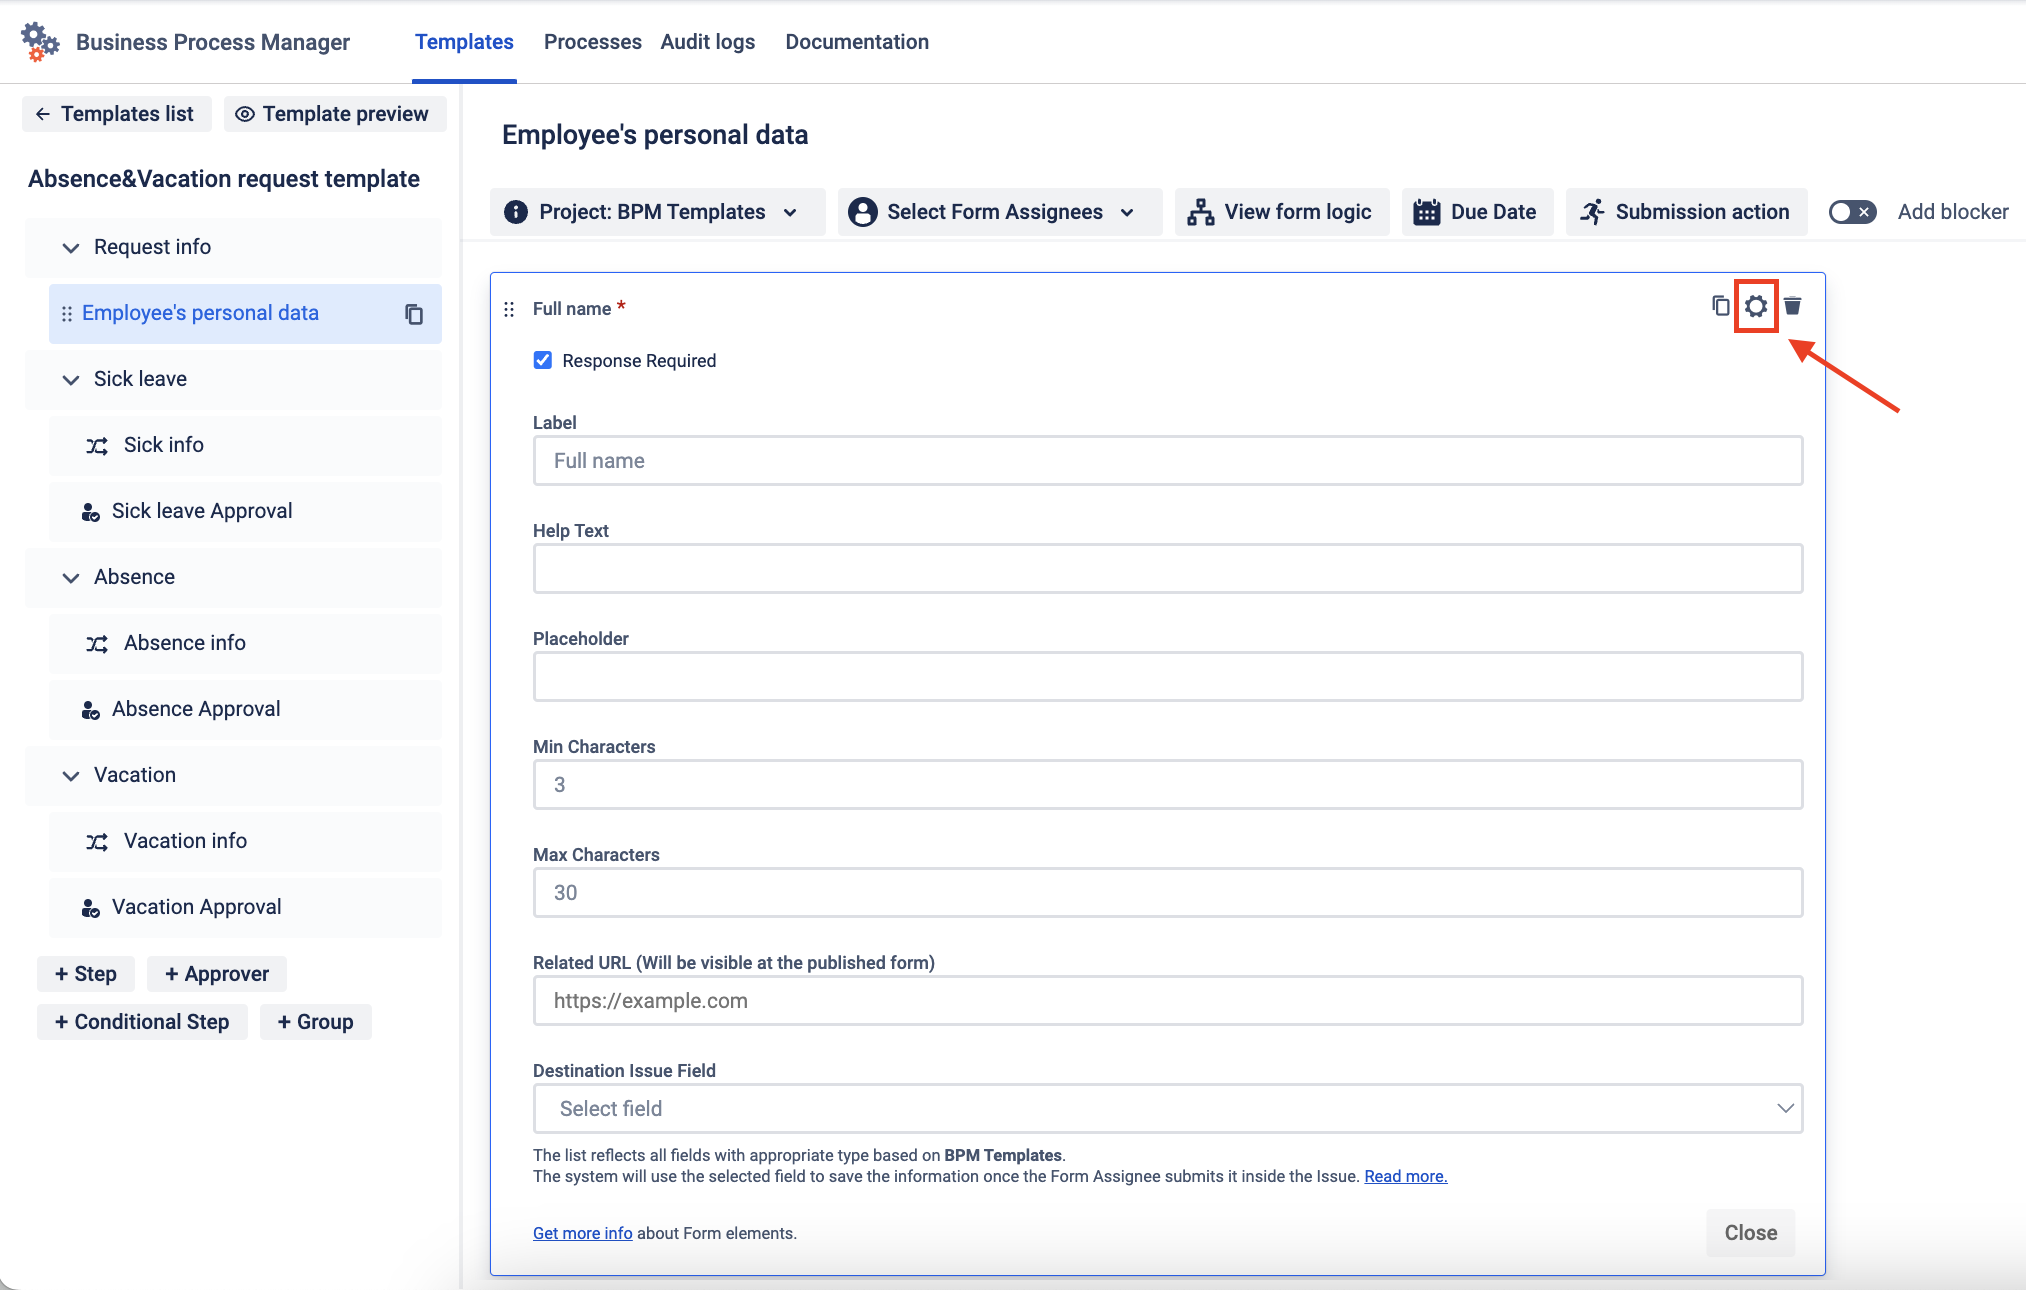
Press on the gear icon to open the element settings. Add a label to the name field (it would be your question text). Also, add other settings you need.
Press the Close button to confirm your changes and then save the template.