1. Find an installed Forms for Jira add-on below the Jira settings menu and click it.
...
2. Build dynamic forms with the Smart Jira Forms is a powerful plugin for Jira Cloud that enables users to create and share dynamic forms within Jira. With a user-friendly drag-and-drop menu. Add Text fields, Dropdowns, Checkboxes, Date and Time, etc to your custom forms and save them.
Also, use the Field logic to build the forms with conditions.
...
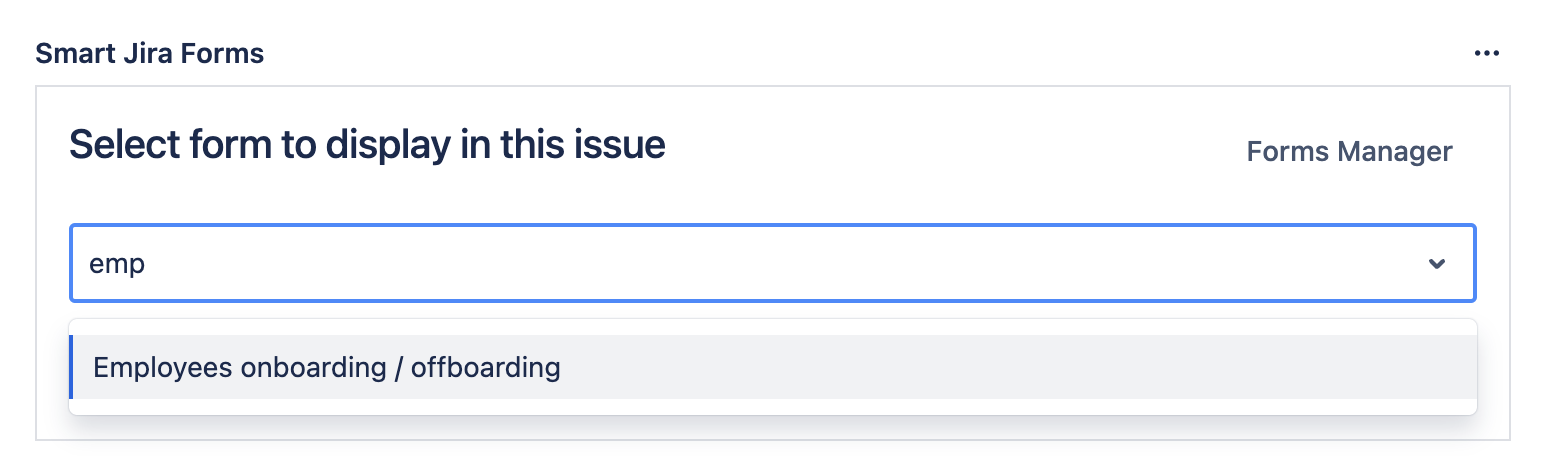
3. Add forms to any Jira issue (Jira Software, Core and Service Management).
To do it just click the add-on’s icon on the issue panel and select one from the list you have created before.
...
Check the documentation on how to add Forms to the Service desk portal.
4. Fill forms with custom data according to the fields.
...
5. Get all Form responses.
Wherever the form has been added, you can always get all the responses in one place.
Go to the Add-on, and click on Responses, so all the form responses will be exported in the Excel format.
...
Please note, that if the form has been added to the private project, the file will include the answers from this project.
6. Set automation
You can set the automation to add the form to the specific project and issue type once the issue is created.
...
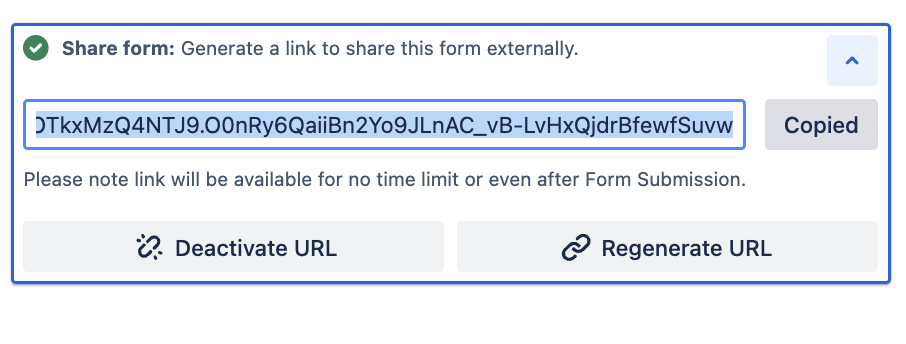
7. Share the form externally
Open the issue with the form inside and click on the “share“ icon.
Then generate the unique URL and send it to the person you whom you want to submit the information.
...
Once form is submitted, the data will be saved in the issue.form builder, it allows you to add a wide range of fields and even attach files to collect valuable data. The plugin supports conditional logic, allowing you to create forms with questions that change based on previous answers. You can automate form addition to specific issue types or add them manually to existing Jira issues. Additionally, Smart Jira Forms allows you to share forms with external users and export form responses to xlsx for analysis. It is a versatile tool that enhances Jira's capabilities for survey collection, feedback gathering, and data analysis.
Key points to effectively utilize Smart Jira Forms:
Create New Form.
Begin your work by clicking the "+Add new" button.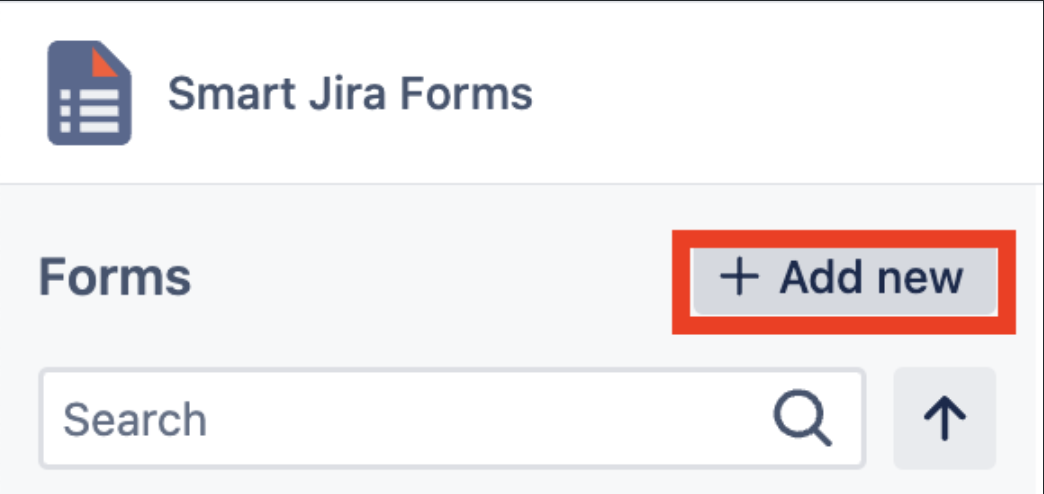
Customize your form by adding form elements or content blocks.
Effortlessly create forms in just a few minutes using the intuitive drag-and-drop form builder.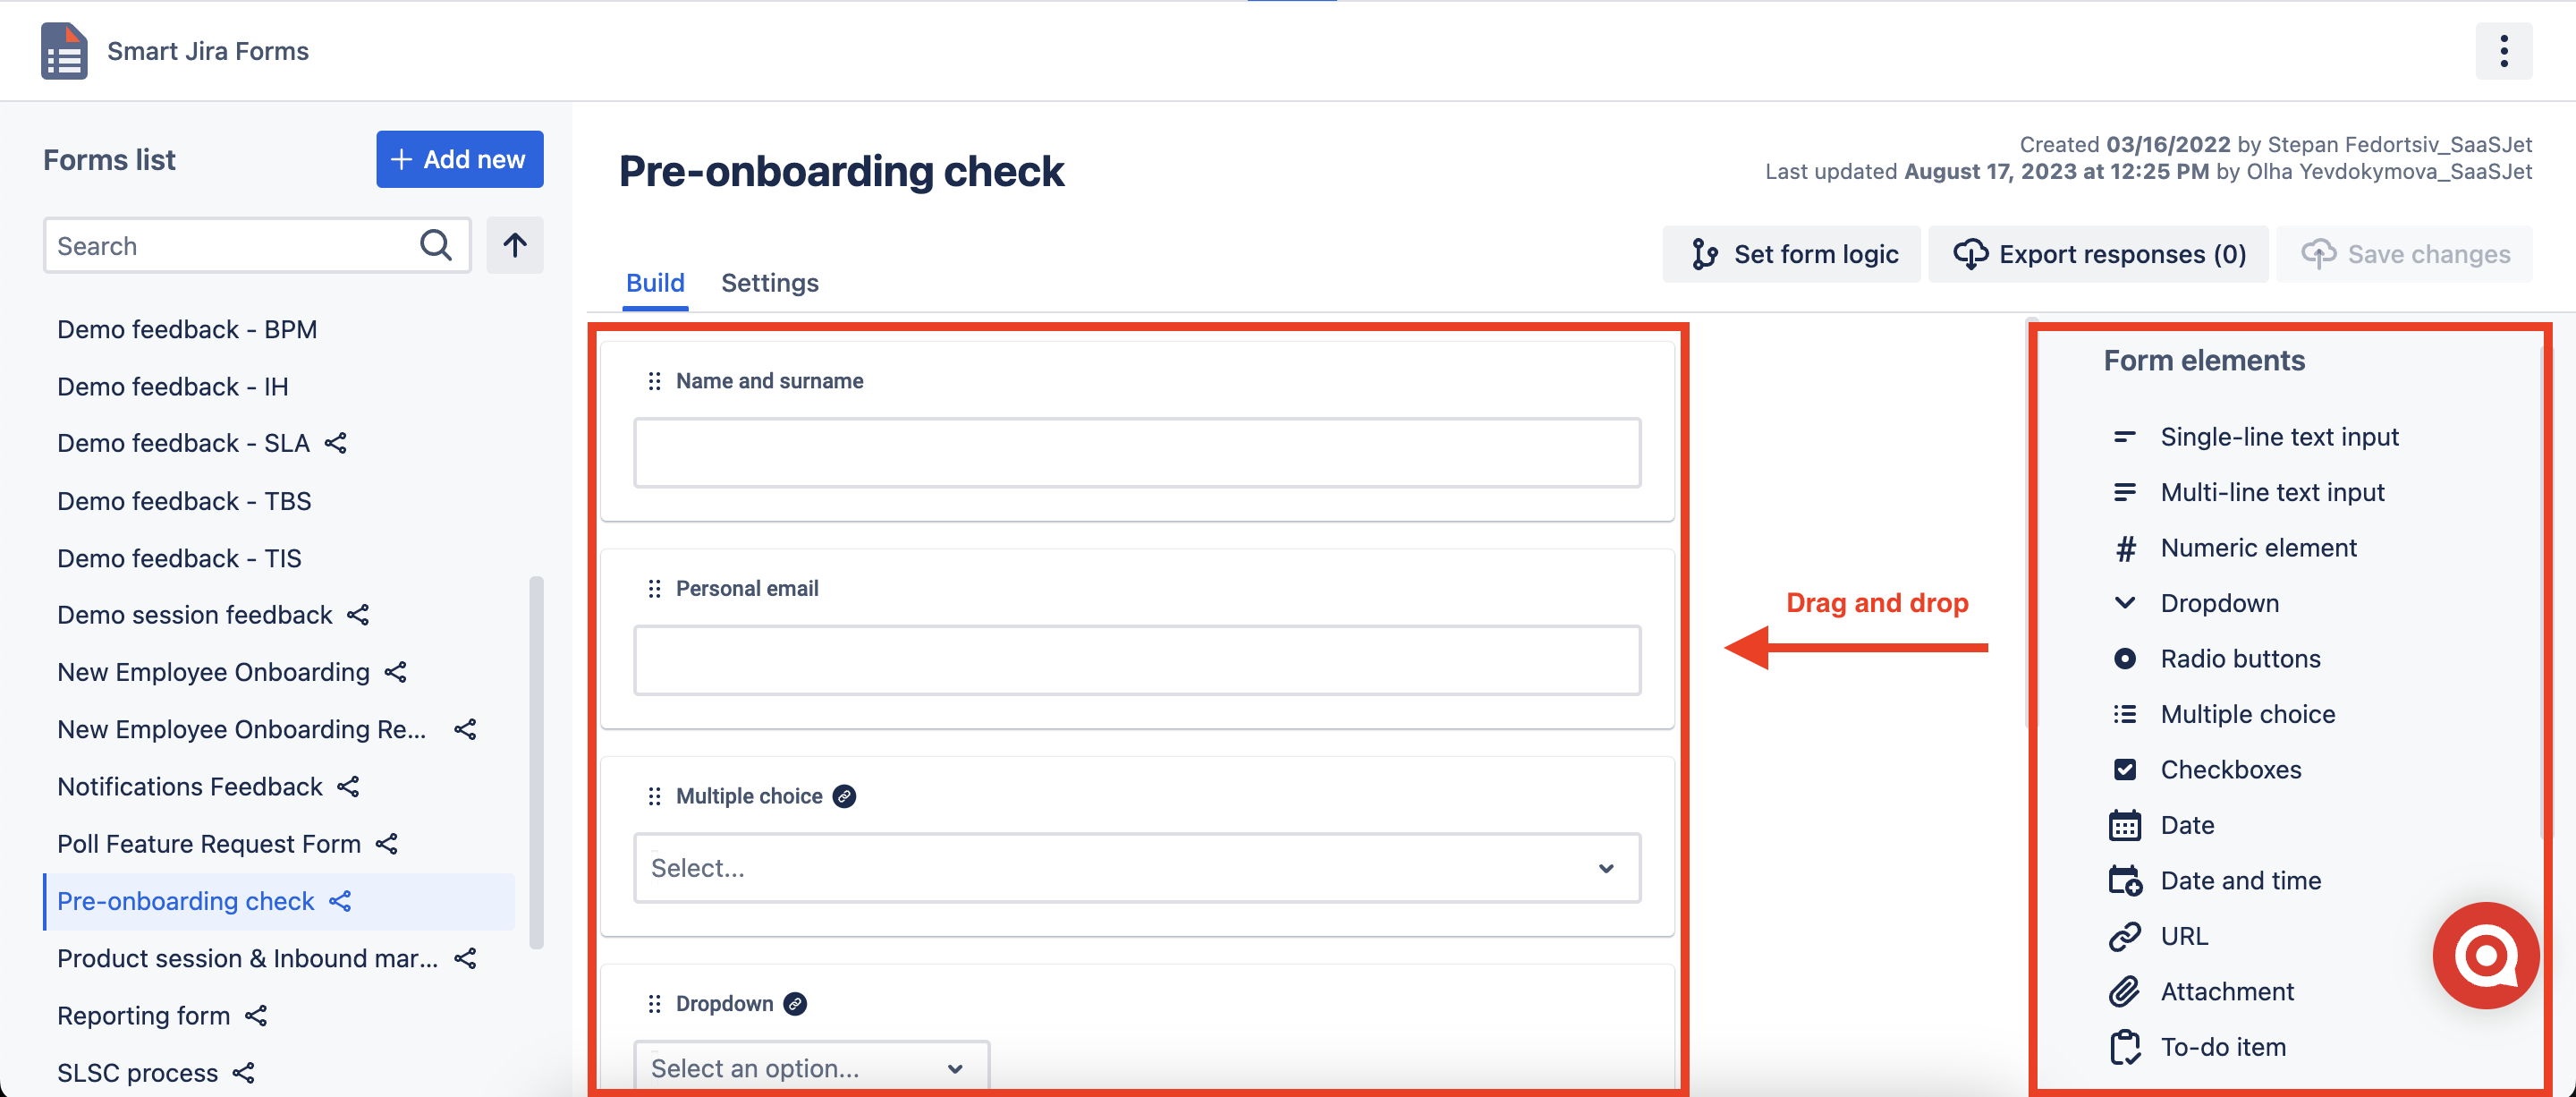
Make forms dynamic.
Harness the power of When/Then logic to create intelligent and optimized forms.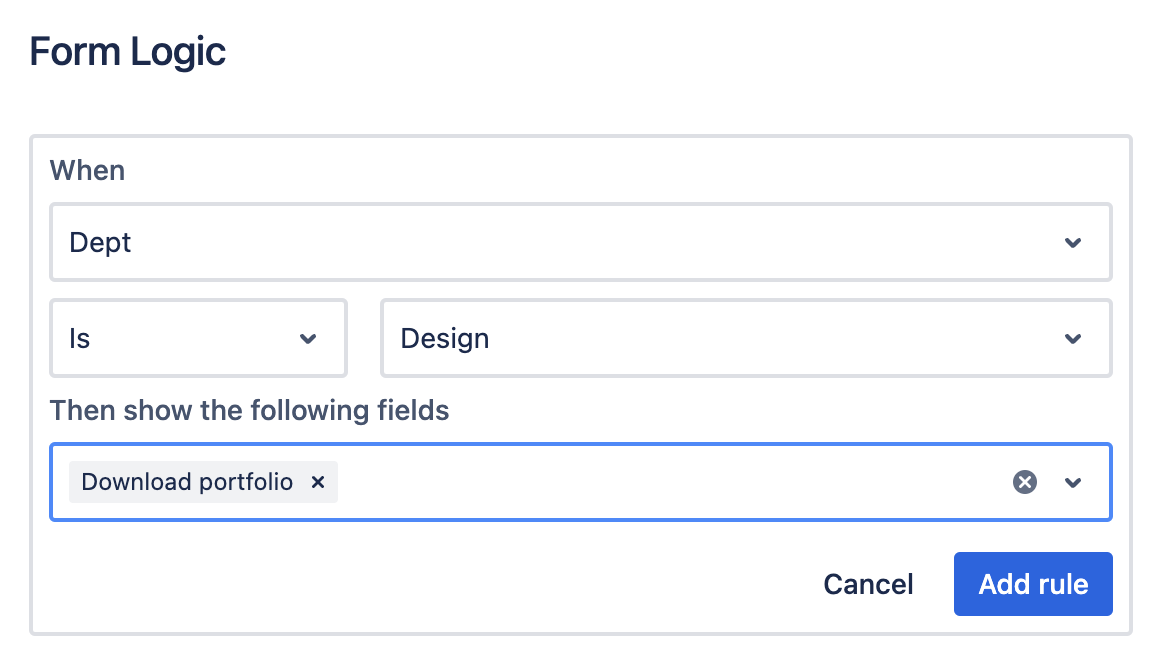
Restrict access to form content and settings editing.
.png?version=1&modificationDate=1710435596873&cacheVersion=1&api=v2&width=736)
Add the form to the Customer Portal or to a Jira issue automatically / manually or even share it with external users.
Automate the form addition by configuring it to automatically attach to specific projects and issue types upon issue creation.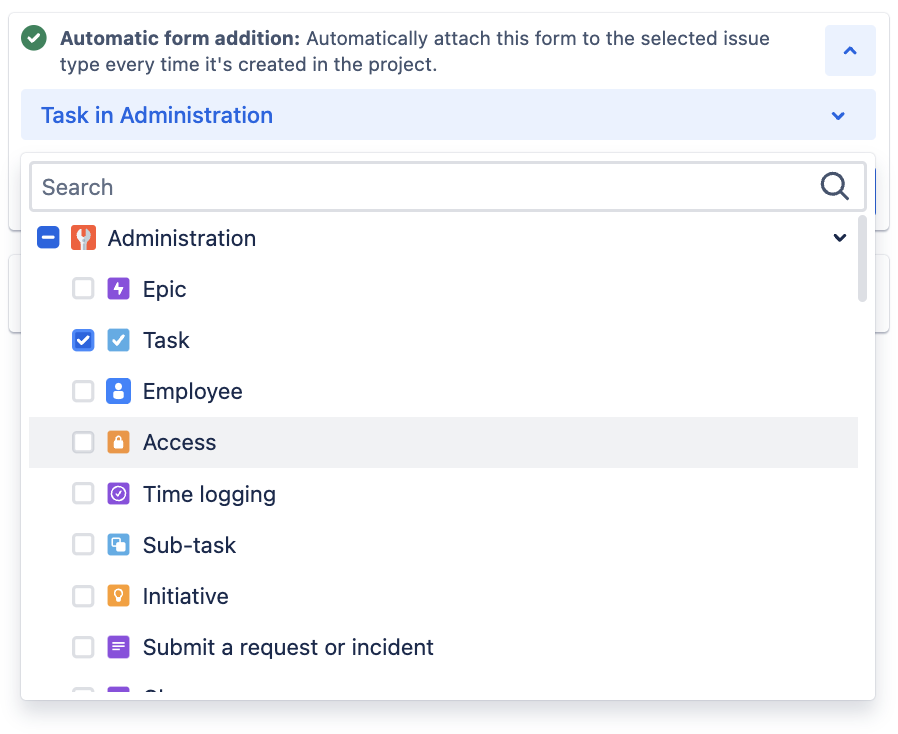
Alternatively, manually add the form by selecting it from your pre-existing form list using the add-on icon in the issue panel.
To share the form externally, access the form within the add-on, click the "Share form" icon, generate a unique URL, and share it with the intended recipient for form submission.
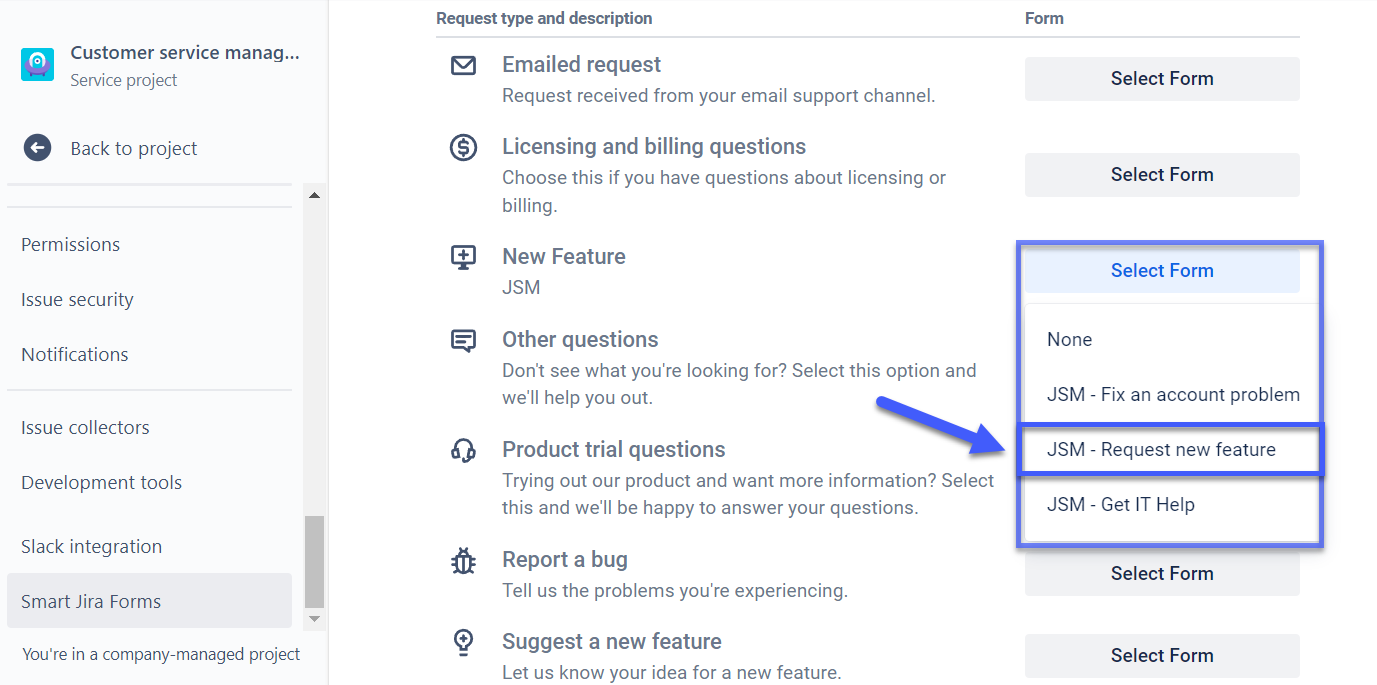
For Jira Service Management (JSM), refer to the documentation for instructions on incorporating forms into the Service Desk portal.
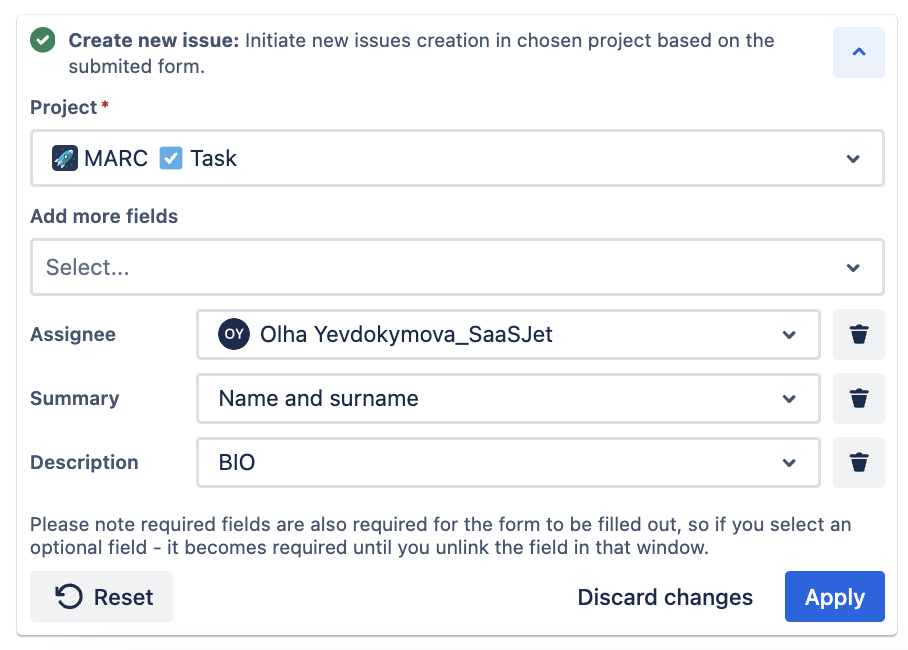
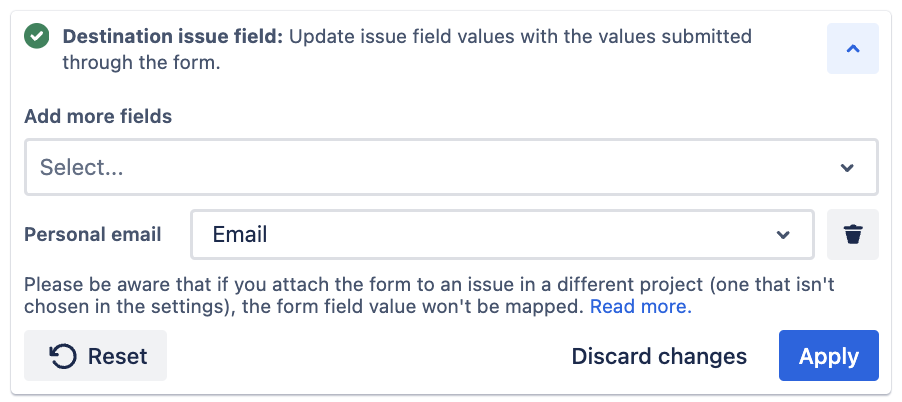
Create new Jira issues based on form responses or map issue fields based on form responses in the existing issue.
PDF or Excel Sheet Export of Form Responses.
Exporting responses in both formats provides users with the flexibility to choose the most suitable format for their specific needs, whether it's for sharing, archiving, or further data analysis.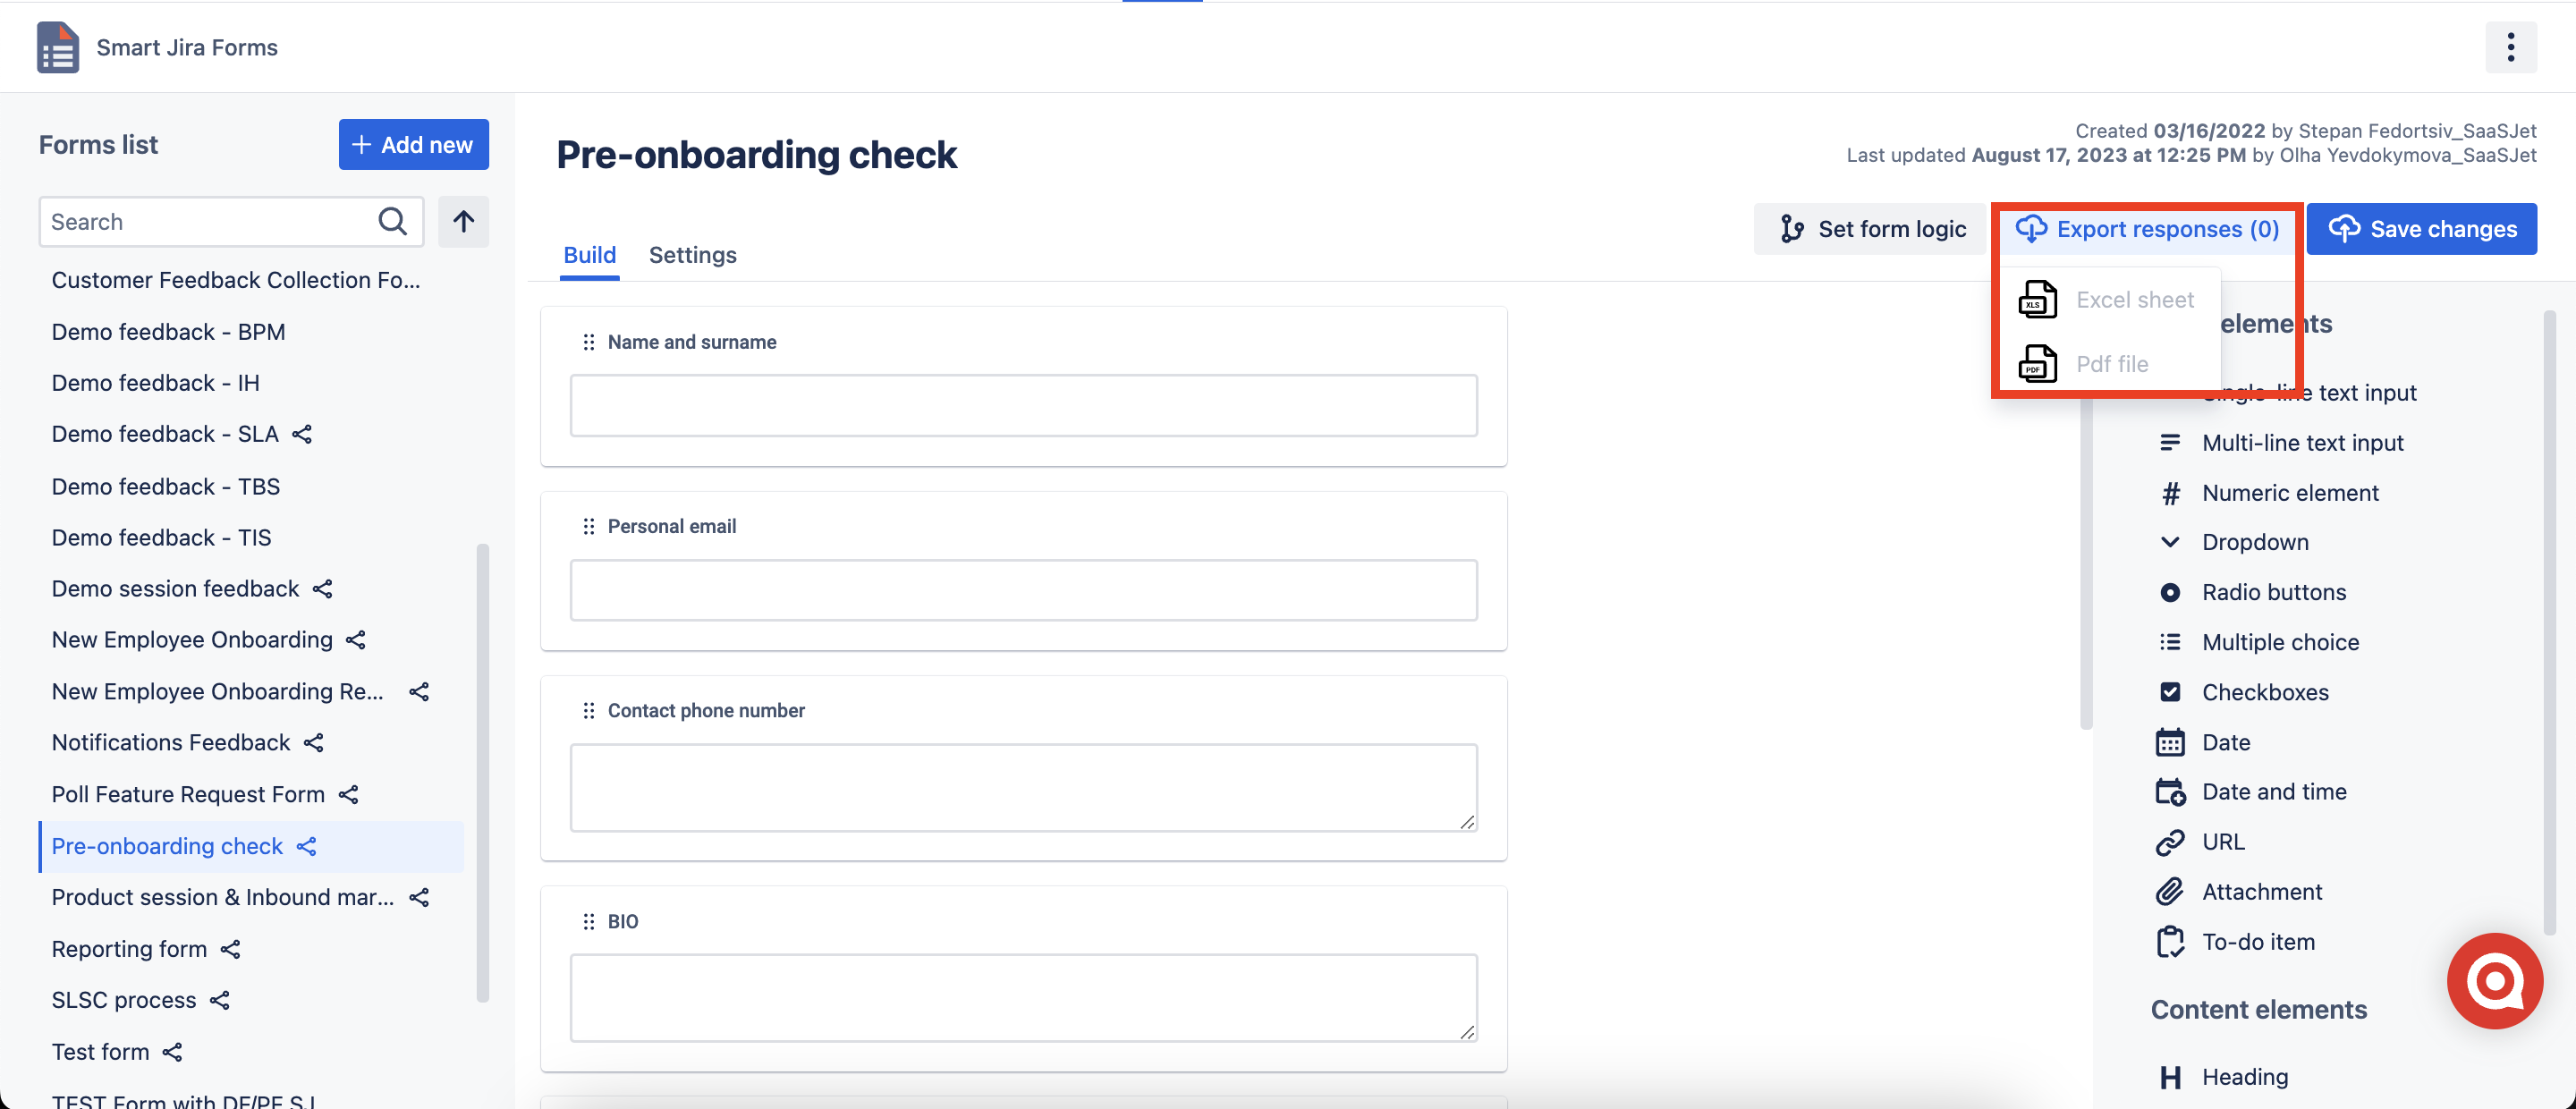
| Info |
|---|
The date format in Audit log is set according to the date format specified in the Jira settings. |
...
...
| Panel | ||||||||
|---|---|---|---|---|---|---|---|---|
| ||||||||
| Info |
|---|
If you need help or want to ask questions, please contact us through SaaSJet Support (Time of the First Response ≤ 4 hours) or via email support@saasjet.atlassian.net |
| Tip |
|---|
Haven't used this add-on yet, then try it now! |