For creating any type of Time in Status for Jira Cloud report, you need to set two types of dates:
Issues period – for issue list selection.
E.g., You want to get data for issues Resolved last week.
2. Time reporting period – for data calculation.
E.g., You want to get a report for the last week only, and it doesn't matter when issues have been created or resolved.
*If you hadn't set it, it will calculate the time data for all time (option Any date - selected by default).
.jpg?version=1&modificationDate=1623075941654&cacheVersion=1&api=v2)
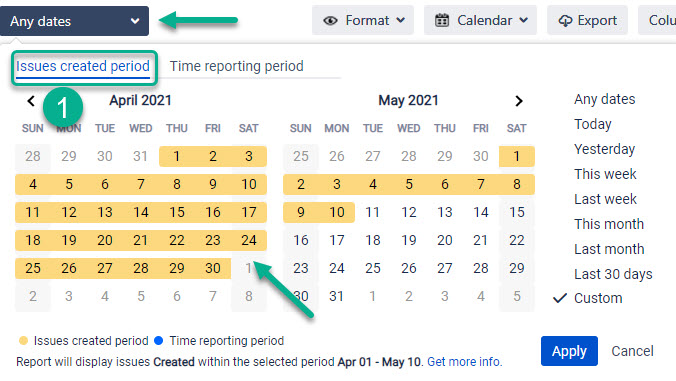
1. Issues period
Choose the Created, Updated, or Resolved item from the drop-down menu to filter the list of issues.
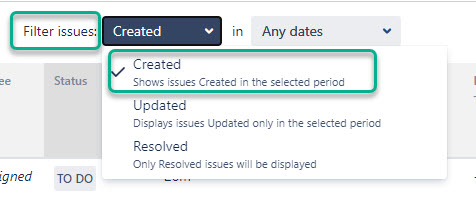
By clicking on Any dates, you’ll get 2 calendars displayed on a screen.
Select the dates for the filtered issues from the “Issues period ” calendar. It’s marked with a yellow color. So, you’ll get a sample of issues that have been created/updated/resolved during the chosen period.
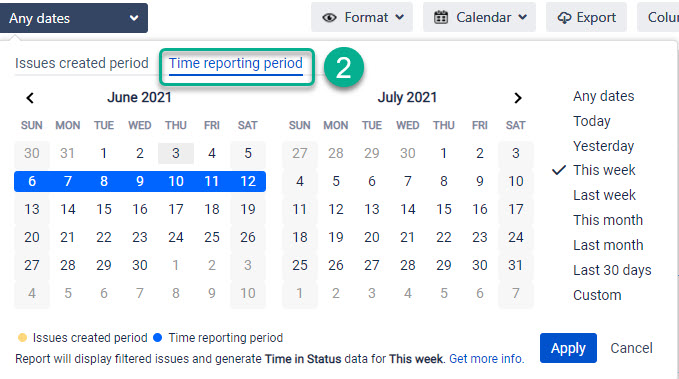
2. Time reporting period
The time reporting option allows you to select the required date range for any report calculation.
It works to cut away the unwanted parts – dates before and after the chosen period, in our case. Thus, you'll get only the time calculated for a specific date limit.
Set a date or date ranges (start/end dates) for data calculation from the “Time reporting period ” calendar. The color of marker is blue. Here is where you crop all unnecessary dates.
Sprint period
If you filter by Sprint, the date range options will be disabled. Issues period and Time reporting period will match the Sprint scope.

To configure the time reporting (trim) option in Time in Status for Jira Cloud Gadget, check out the Gadget section.
If you need help or want to ask questions, please contact SaaSJet Support or email us at support@saasjet.atlassian.net |
Haven't used this add-on yet? Try it now! >>> |